Acting on events
- Lauren Ipsum (Unlicensed)
Overview
When you right-click on an event in the calendar, you will see a menu of options.
The options that appear will depend on a number of factors, such as:
- Whether the event was newly booked online
- The status of the event
- Whether the event is in the past, the future, or on the current date
- Whether the event is linked to a patient
- Whether the event is a telehealth appointment
- Whether online forms have been sent in connection with the appointment
This page covers all those options.
Incoming online bookings
Today's appointments: in-clinic monitoring
Basic actions on events
Delete
- This is an option for all events except those for which an automated appointment reminder has been sent.
- Deleted events will show in the <Inactive> status view of the schedule.
- Deleted events whose would-be times are in the future can be restored from the patient journal.

- Deleted events whose would-be times are in the future can be restored from the patient journal.
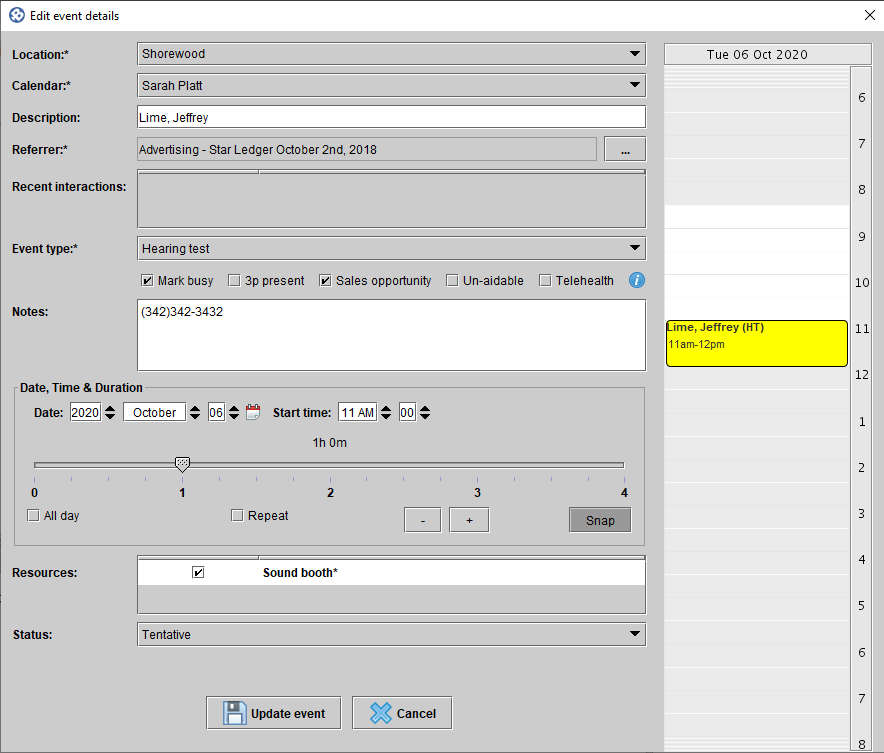
Edit details
- This is an option for all events. Clicking it will open the Edit event details dialog, allowing you to edit the event details.
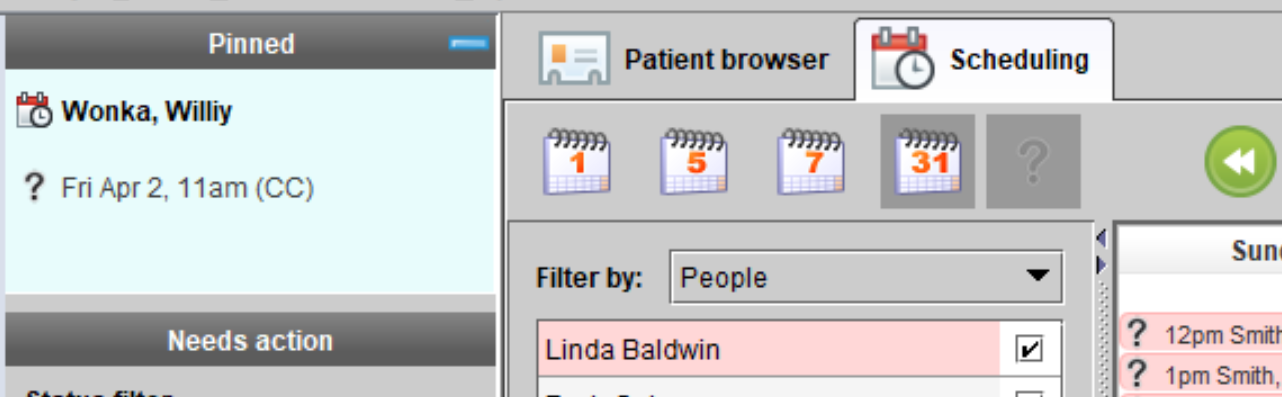
Pin for rescheduling
- This is an option for all events that are not in the Completed status.
- Clicking this option will allow you to reschedule the event by pasting it elsewhere on the schedule.
- When you pin an event, it will be visually represented for you above the Needs action panel as pinned. Only one event can be pinned per user at a time. Having an event pinned only affects your login session, and not anyone else's; the event still exists in the schedule with all its properties while it's pinned.
- If the event from the past is pinned and moved to the future, the original event will remain in the schedule as a cancelled event, and your act of "pasting" the event in the future, creates a new and separate event; this is to ensure accurate and insightful reports.
Reschedule
- This is an option only for events such that:
- The event is in the past and its status is not Completed, Arrived, or In progress.
- The event is in the future and its status is Cancelled.
- Clicking the option will open the Edit event details dialog, allowing you the reschedule the event for a future date, and to change the event's status.
Event history
This is an option for all events. Clicking it will open the Event history dialog, which will show the date, user, and description of the adjustments made to the selected event, and the state changes of any online forms associated with the event.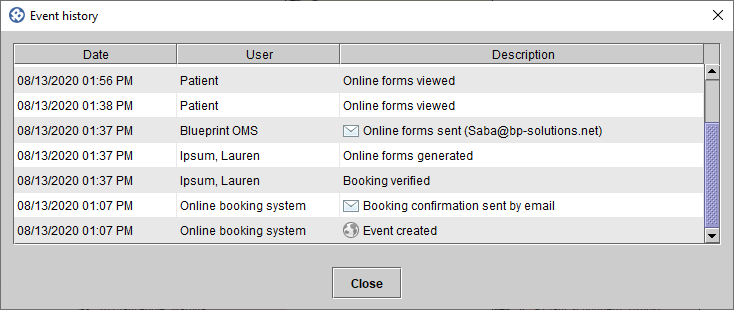
Change status
This is an option for all events. It is a sub-menu of event statuses. Select one of the options to set that as the new status for the event.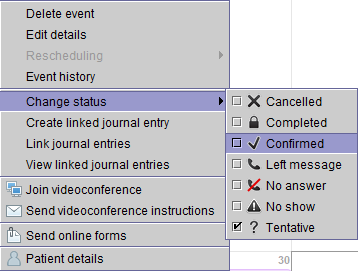
Journal entries
See also: Patient journal entries and Linking journal entries to events.
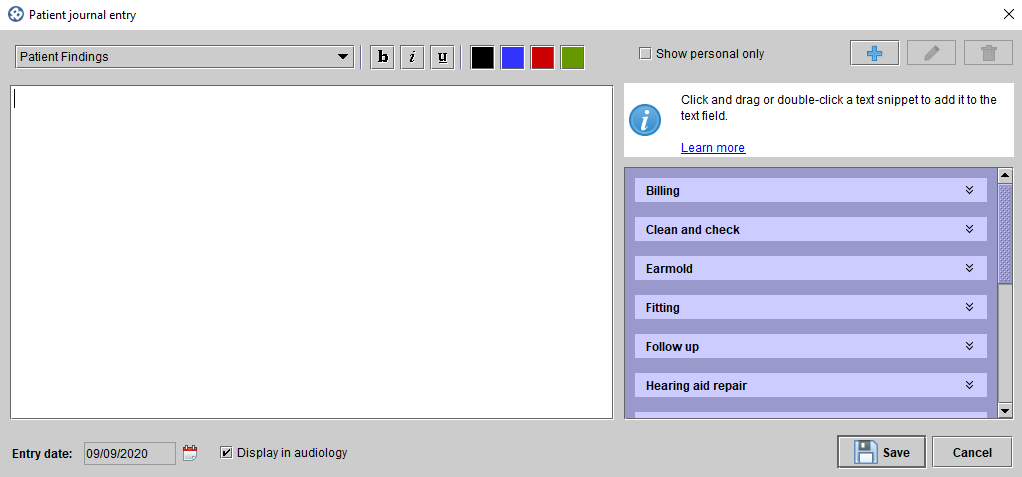
Create linked journal entry
- This is an option for events that are linked to patients or QuickAdds. Clicking this option will open the Patient journal entry dialog, allowing you to a new journal entry which will be linked to the event.
- If the appointment type has Journal entry required set, then creating a linked journal entry will fulfill that requirement.
- If the appointment is in Completed status, this fulfillment will be indicated visually by lock icon turning from red
 to black
  (if the appointment is linked to a patient) or to grey
  (if the appointment is linked to a QuickAdd).
- If the appointment is in Completed status, this fulfillment will be indicated visually by lock icon turning from red
Link journal entries
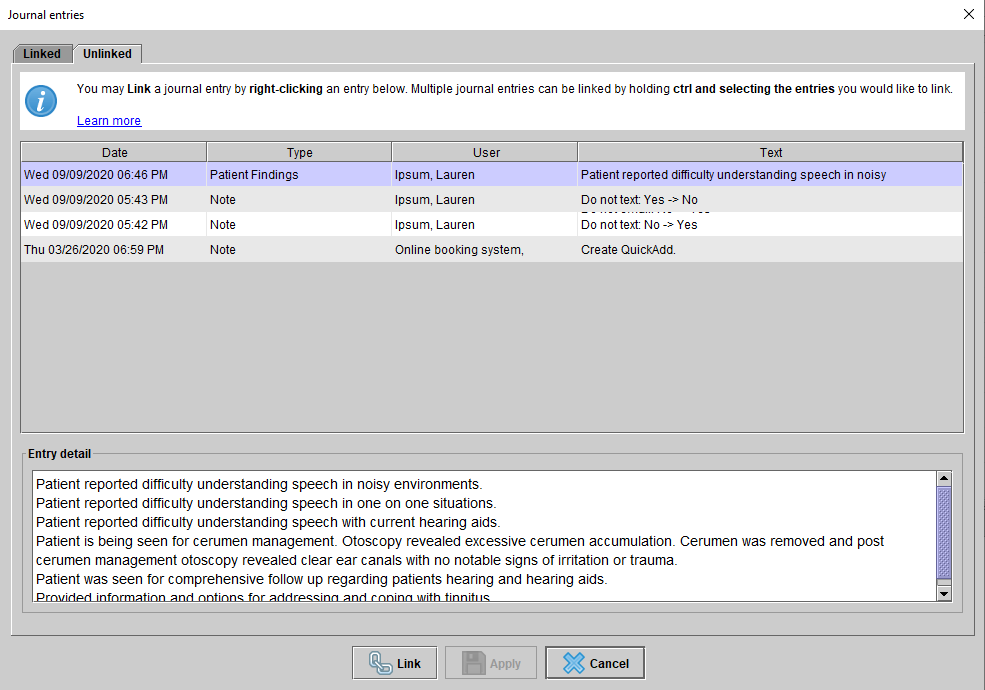
- This is an option for events that are linked to patients or QuickAdds. Clicking this option will open the Journal entries dialog, set to the Unlinked tab. The Unlinked tab will show all the patient's journal entries that are not currently linked to appointments and that are enabled for linking to events.
- At Setup > Journal entry types, users with the Maintain journal entry types user privilege can edit the Can link to event setting for any of the journal entry types.
- If the appointment type has Journal entry required set, then linking a journal entry will fulfill that requirement.
- If the appointment is in Completed status, this fulfillment will be indicated visually by lock icon turning from red to black (if the appointment is linked to a patient) or to grey (if the appointment is linked to a QuickAdd).
- If the appointment is in Completed status, this fulfillment will be indicated visually by lock icon turning from red
View linked journal entries
This is an option for events that are linked to patients or QuickAdds. Clicking this option will open the Journal entries dialog, set to the Linked tab. If any journal entries are linked to the event, you will be able to read them.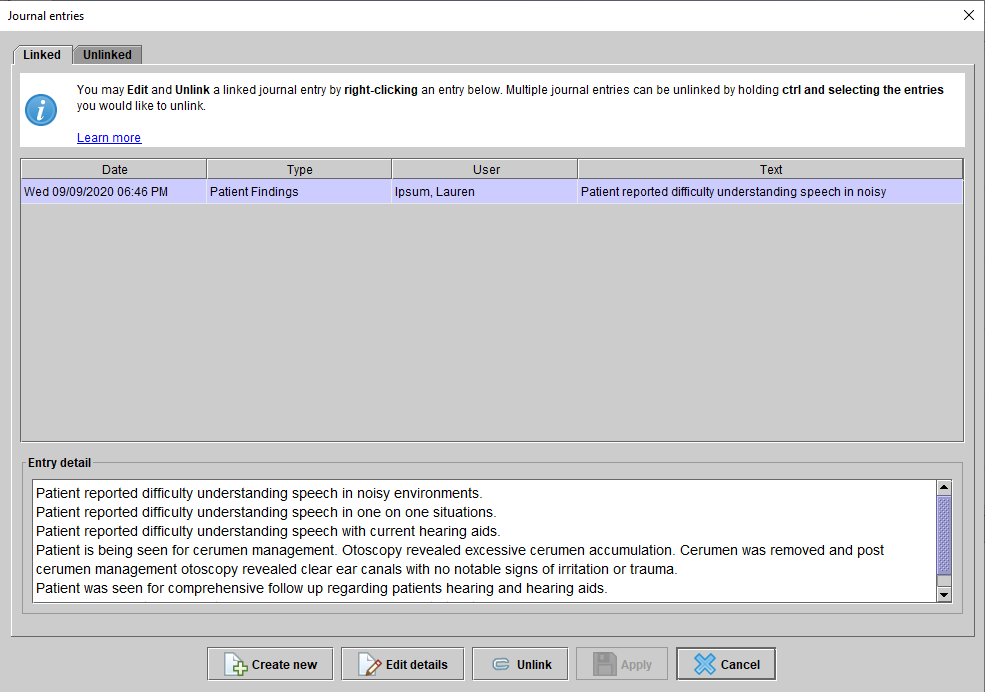
Telehealth videoconferences
See also: Setting up Telehealth appointment invitations.
Initiate videoconference
- This is an option for future events that are linked to patients/QuickAdds, and are not marked as telehealth events.

If you click this option, you will be prompted to send an invitation for an impromptu videoconference to the contact. Then, the chosen telehealth platform will launch.
If your clinic does not have a customized template in place for impromptu telehealth videoconference invitations, then the instructions will be used with those default invitation templates. The default instructions for each platform can be customized at Setup > Scheduling > Telehealth.
You can also initiate telehealth videoconferences this way by using the Patient drop-down menu.
Join videoconference
- This is an option for events that are linked to patients/QuickAdds, and are marked as telehealth events.

- If you click this option, the chosen telehealth platform will launch.
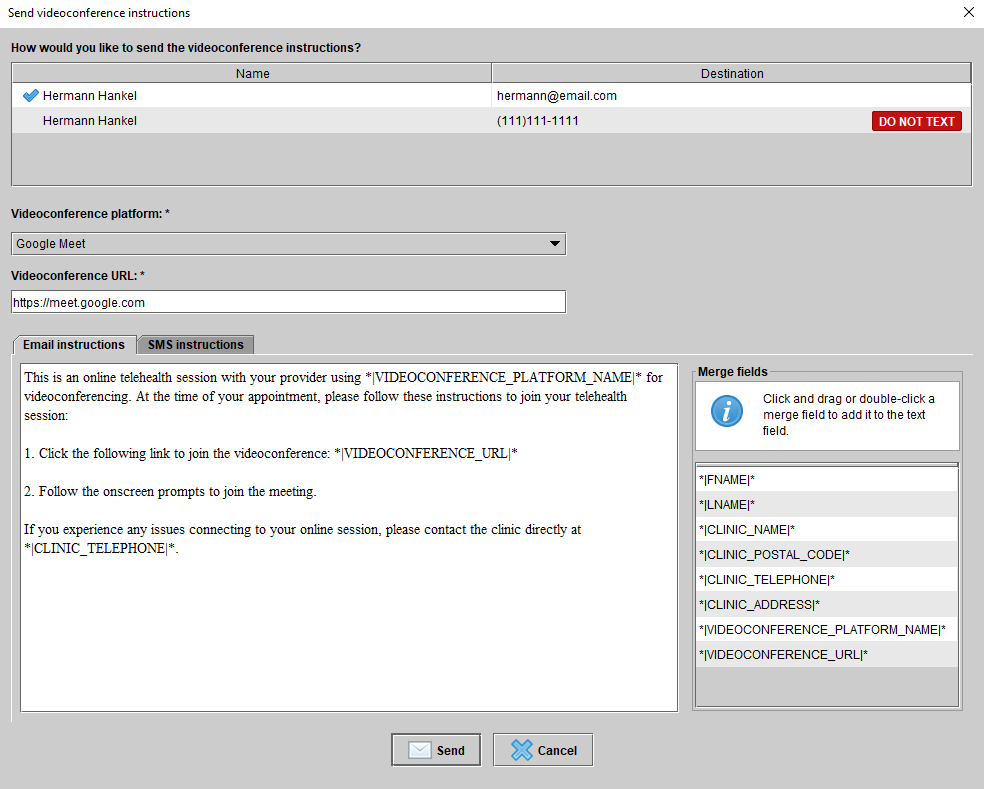
Send videoconference instructions
- This is an option for events that are linked to patients/QuickAdds, and are marked as telehealth events.
- The patient will most likely have received videoconference instructions already. This option allows you to send the instructions again. It is recommended that you do this a few minutes before the videoconference is scheduled to take place.
- If you click on this option, you will be prompted with the Send videoconference instructions dialog, which will allow you to choose how to send the instructions, and give you a chance to edit the instructions.
Online forms
Details about the linked patient or QuickAdd