Entering appointment details
- Anonymous
Jessica Colaw
Bridget Fritzke
Overview
Details of a new appointment can be specified in the Create event dialog box. This dialog box also displays a preview of the selected provider’s schedule for the selected date, with the new appointment highlighted in yellow. Depending on user-configurable settings in the Setup menu, double-booking (of either providers or resources) may be allowed. If double-booking is not allowed, the preview panel will help ensure that the new appointment does not conflict with existing appointments.
Selecting a patient
The Select patient dialog box will appear. In it, do one of the following:
- Select None at the top of the list.
- Select the desired patient or QuickAdd.

Next Appointment (if applicable)
In the Create event dialog box, click the Next Event calendar icon to hide or show details. This icon will only appear if the selected patient has a future appointment.

Setting the location
In the Create event dialog box, click the Location drop-down menu to select a location.
- The location specified in the patient’s Details tab (if a patient was specified).
- The location currently being viewed (if <All> is not selected).
Setting the calendar
In the Create event dialog box, click the Calendar drop-down menu to select the desired provider.
- The preferred provider in the patient's Details tab (if a patient was specified).
- The default provider for the selected location (if only one provider is present at the selected location).
Setting the description
In the Create event dialog box, if a patient is specified, the Description field is predefined with the patient's name. If the appointment is not linked to a patient file, enter a description of the appointment in the Description field.
Setting the referral source
- In the Create event dialog box, click the ellipses button to select the desired referral type and source for the appointment.
- Use the search bar to narrow down your list.

3. Highlight the desired referral source and click  .
.
Optionally, click on the  button to include your patient list in the referral source search.
Click on the  button to include healthcare providers.
You will be prompted to select which referral source you’d like to keep on the appointment if the most recent referral source differs from the selected source for and appointment not yet linked to the patient's file.

Setting the event type
In the Create event dialog box, click the Event type drop-down menu to select the desired event type.
Event types can be configured in the Setup menu. For more information, see: Setting up event types.
Selecting appointment analysis information
- Mark busy: Serves as a visual indicator that the provider should NOT be double-booked for another appointment. The appointment will show in a solid color on the calendar. If Mark busy is not checked, the appointment will show in white on the schedule, with a colored outline.
- Companion present: Indicates the patient will be bringing a family member/friend to the appointment.
Sales opportunity: Indicates the appointment presents an opportunity for a sale.
The Un-designate events as sales opportunities user privilege is needed to remove the sales opportunity designation when creating or editing events.
- Un-aidable: is a checkbox option for Consult YHN members. This data can be transferred to the Consult YHN Wake Up Call.
Designating the event as a telehealth appointment
Complete the following steps if the event you are creating is a telehealth appointment.
- In the Create event dialog box, check the Telehealth checkbox. This checkbox will already be checked if the chosen event type was set as a telehealth event type.
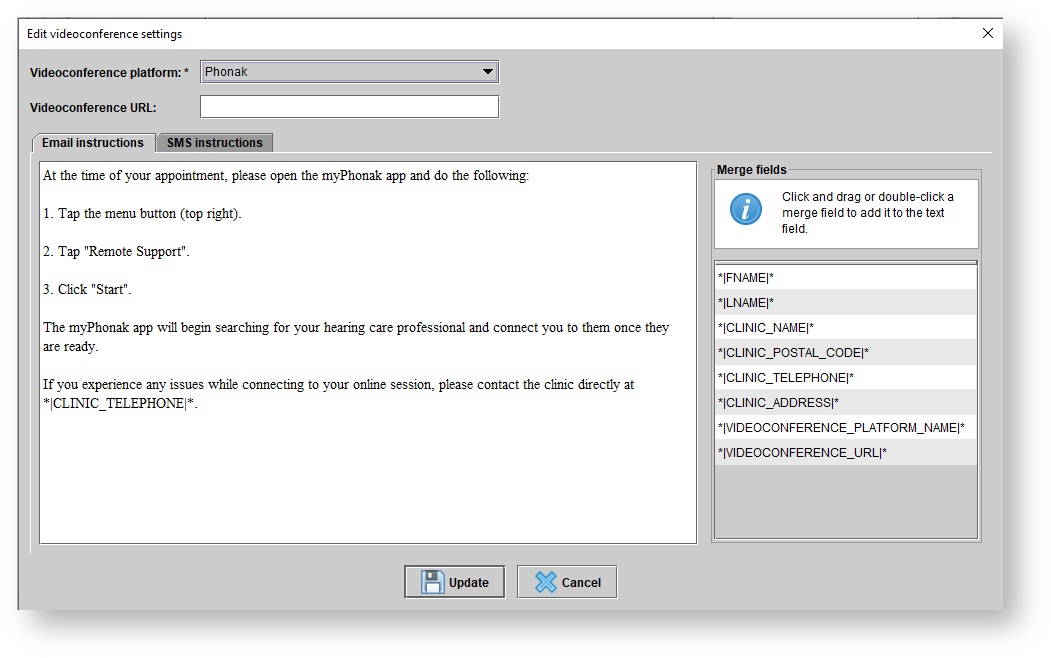
- Once the Telehealth checkbox is checked, the Videoconference field will appear below. If a default telehealth platform has been set, or if the chosen provider has provider-specific platform settings, information will appear in the Videoconference field by default.

3. If no details populate in the Videoconference field by default, or if you wish to edit the platform, URL, or instructions, click on the  button to the right of the Videoconference field. The Edit videoconference settings dialog box will appear. In it, ensure that the platform, URL, and instructions are as desired. Then click UPDATE.
The instructions will be embedded in the standard appointment invitation template, so there is no need to add a greeting line or a signature.
For more information about the instruction templates, see: Setting up telehealth appointment invitations.
To designate event types as telehealth event types, go to Setup > Scheduling > Event types and edit those event types. The Maintain event types user privilege is required for this.
For instructions on telehealth-related menu options on calendar events, see: Acting on events: Telehealth videoconferences.
Setting notes
Appointment notes, not to be confused with journal entries linked to appointments, are meant to be written ahead of the appointment and to include brief pieces of information relevant either to the provider or the front office staff, about the appointment. If a patient is specified, the Notes field is predefined with the patient’s preferred telephone number.
In the Create event dialog box, click in the Notes field to optionally type any appointment notes.
Setting date, time, and duration
- To adjust the day of the appointment in the Create event dialog box, do one of the following:
- Use the
 icon to select a different date on the calendar.
 - Use the up and down arrows beside the Date field.
Type the desired date directly into the Date field.
To save the change, click out of the cell, or click Enter on the keyboard.
- Use the
- To adjust the time of the appointment in the Create event dialog box, do one of the following:
- In the preview panel, use the mouse to drag-and-drop the appointment to the desired start time.
- Use the up and down arrows beside the Start time field.
Type the desired time directly into the Start time field.
To save the change, click out of the cell, or click Enter on the keyboard.
- To adjust the duration of the appointment in the Create event dialog box, do one of the following:
Drag-and-drop the slider bar to the appropriate duration.
Activate the Snap feature by clicking the SNAP button. If the Snap feature is activated, the slider automatically defaults to the nearest 15-minute interval when the mouse button is released. The + and - buttons will increase or decrease the available duration to 4, 12, or 24 hours.- In the preview panel, use the mouse to drag-and-drop the top or bottom of the appointment to the desired duration.
Setting the appointment for all day
In the Create event dialog box, click the All day check box. This will change the appointment time to 12:00 am - 11:59 pm.
To block out a day in which a provider is not available, see: Scheduling availability.
Creating repeating appointments
In the Create event dialog box, click the Repeat check box.
In the Edit repetition details dialog box, enter the repeat pattern details.
Ensure the End date is not before the Start date.Click Save.
See: Changing a repeating appointment for adjustment information.A maximum of 180 event instances will be created.
Reserving resources
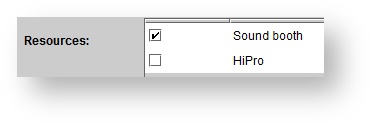
In the Resources section of the Create event dialog box, select any resources to book for the appointment.
 Resources and resource typed are set by location under Setup > Scheduling.
Setting appointment status
In the Create event dialog box, click the Status drop-down menu to select the desired appointment status.
Appointment status can be changed when new appointments have been confirmed, existing appointments have been cancelled, patients do not show to the appointment, etc. For more information, see: Changing the status of an appointment.
Saving the appointment
- Once all required fields in the Create event dialog box are complete, including: Location, Calendar, and Event type, click CREATE EVENT.
If double-booking is not allowed, and the new appointment conflicts with an existing appointment, the Conflicting event(s) found error message is displayed and the Create event dialog box remains open so the appointment can be edited accordingly.
-
Page:
-
Page:
-
Page:
-
Page:
-
Page:
-
Page:
-
Page:
-
Page:
-
Page:
-
Page: