Creating new users
- Bridget Fritzke
- Jessica Colaw
- Mitchell Guimont
Users must have the Maintain users and roles privilege in order to manage users.
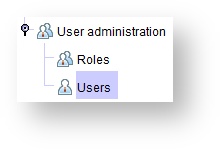
Viewing the list of users
- Click the Setup button on the main toolbar.
- Double-click User administration, or click the icon to the left to expand the menu.
Click Users.
Creating a new user
At Setup > User administration > Users, click CREATE NEW button at the bottom of the screen.
The Create user dialog will appear; in it, enter all required information, and click CREATE.
- Optionally, add the user's Job Title and Qualifications for correspondence, and add an NPI Number for insurance claims.
- Check the has calendar checkbox if you want this user to have a calendar on the Scheduling tab.
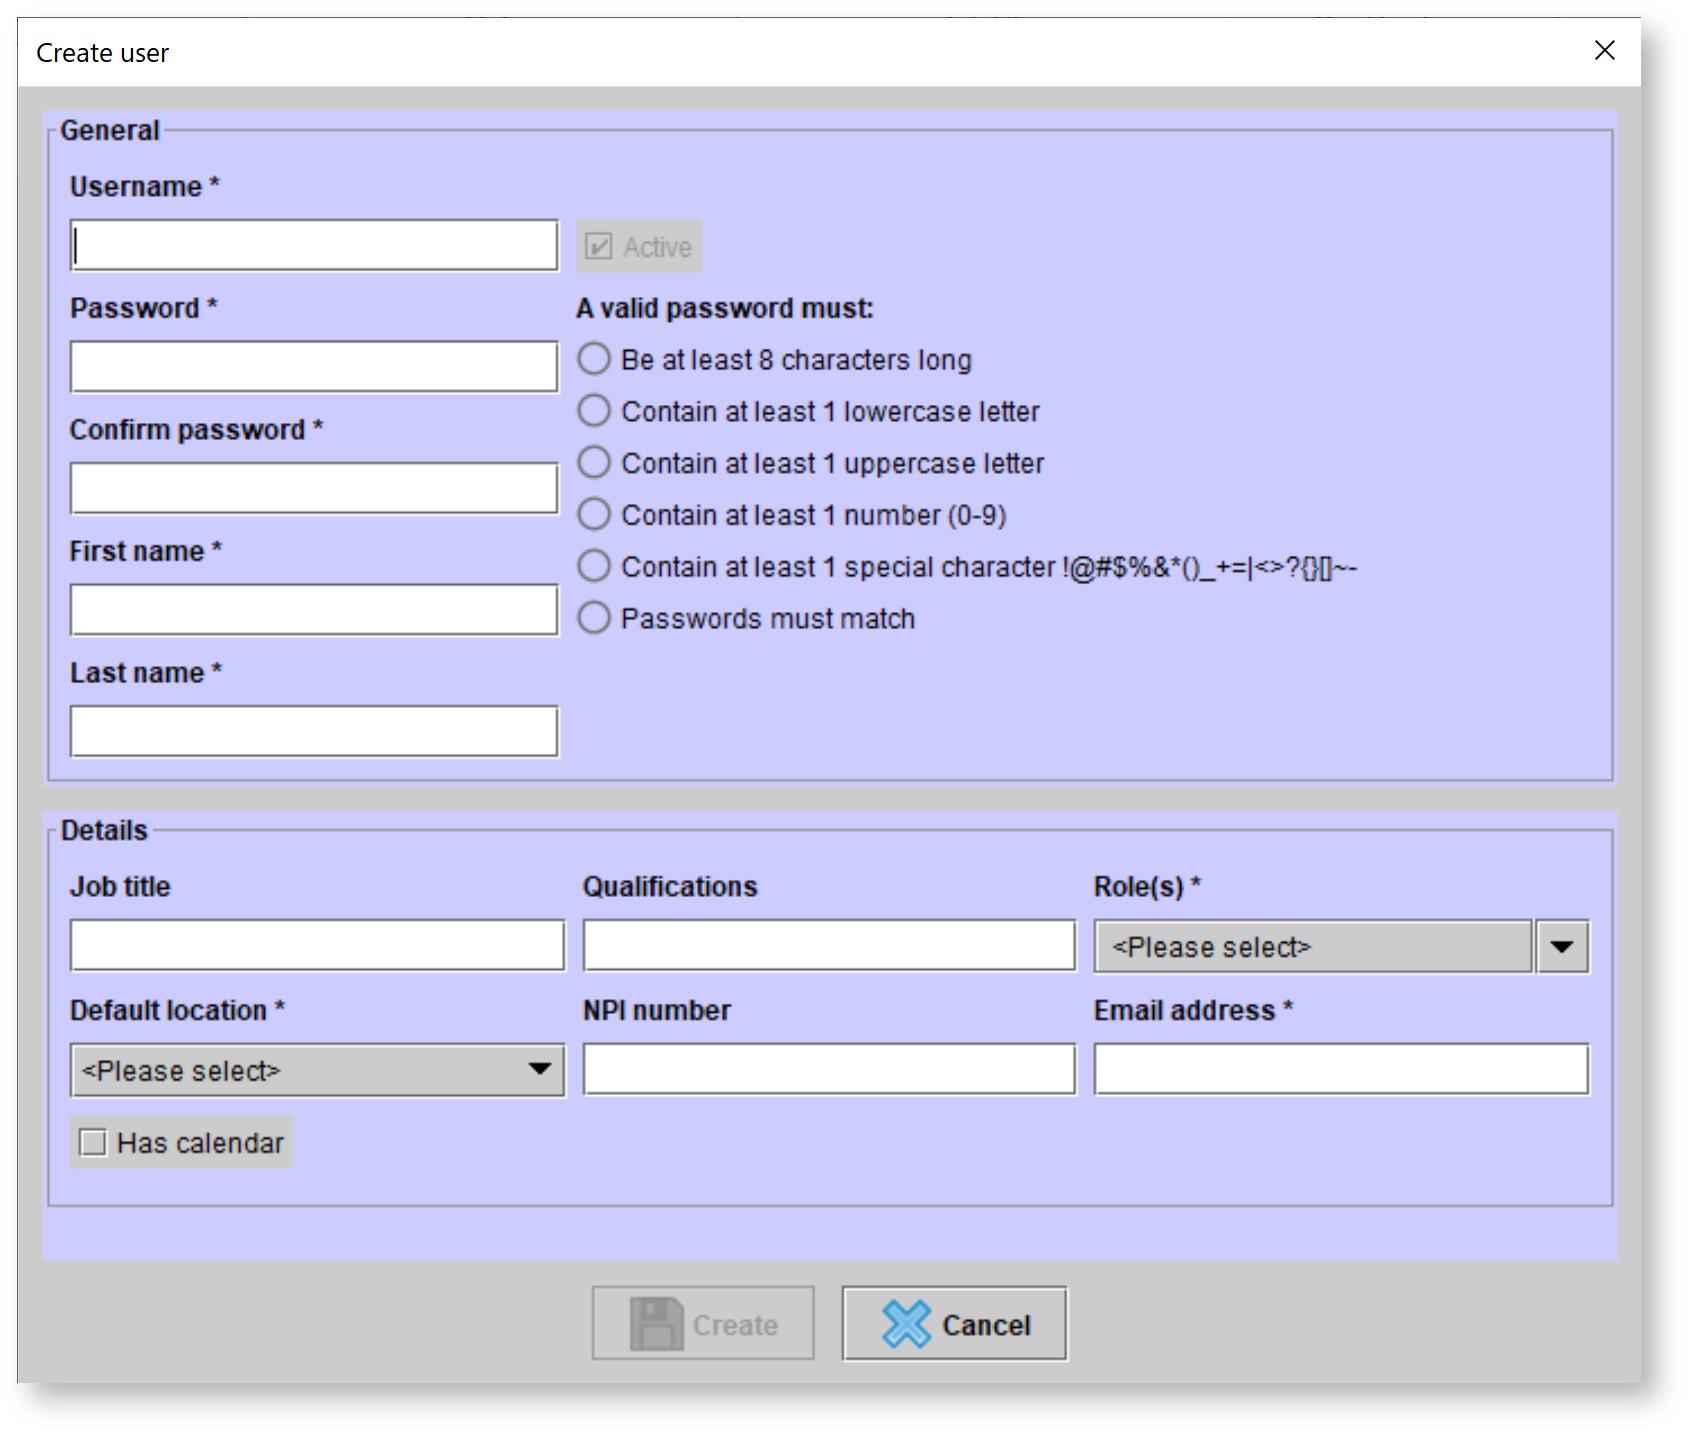
The user will automatically inherit all privileges and reports associated with the assigned Role(s).
Usernames and email addresses must be unique.
Setting up a user calendar
- In the Create user dialog, check the Has calendar checkbox to place the user on the Schedule screen.
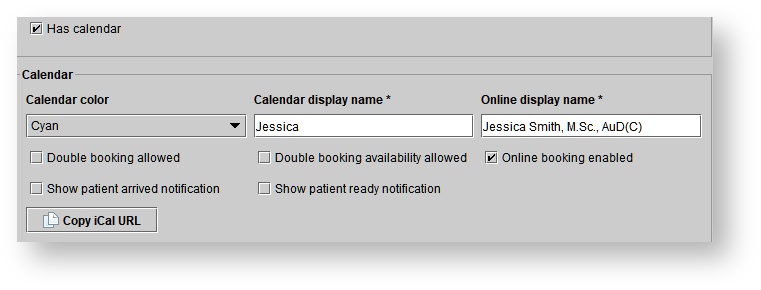
2. Select a Calendar Color from the drop-down menu
3. Enter a Calendar display name
4. Users listed on the calendar may click Copy iCal URL to integrate their mobile device with their Blueprint OMS schedule.
- Optionally, check the Double booking allowed checkbox to permit appointments to be scheduled at the same time under the provider's name.
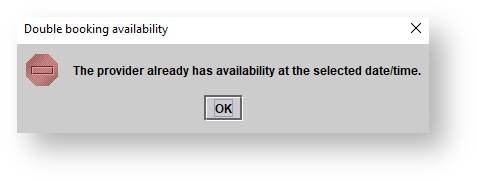
- Optionally, check the Double booking availability allowed checkbox to permit more than one instance of availability for a provider in the availability view of the calendar.
If this box is not selected and users attempt to create more than one availability block for a provider, they will receive the following error message
- Optionally, check the Online booking enabled checkbox if patients may choose this provider when booking appointments online. When this setting is enabled,
Setting user location access
Once you click CREATE after adding new employee information into Blueprint OMS, the Edit user locations dialog will appear:
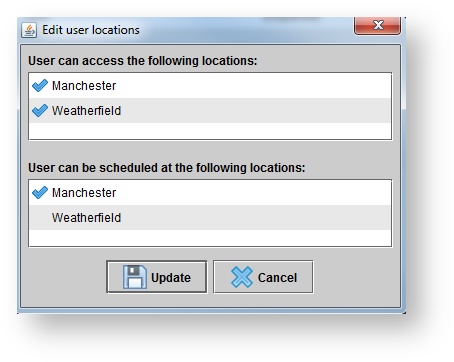
- Click on the desired locations to grant access to or restrict access from the user under the User can access the following locations section
If the user is included on the scheduling tab (Has calendar box checked), click on the desired locations in which the user's name should appear in the User can be scheduled at the following locations panel
A blue checkmark will indicate the user has access to or can be scheduled at the location.
Uploading a user signature
Upload user default user signatures to populate on suitably configured forms and correspondence templates. This saves time and paper at the clinic.
Have staff members sign a white piece of paper using a dark, thick pen or marker. Then, take a scan of the signatures.
Dimensions
For best results, use this guide which is set up with the dimensions Blueprint OMS uses.
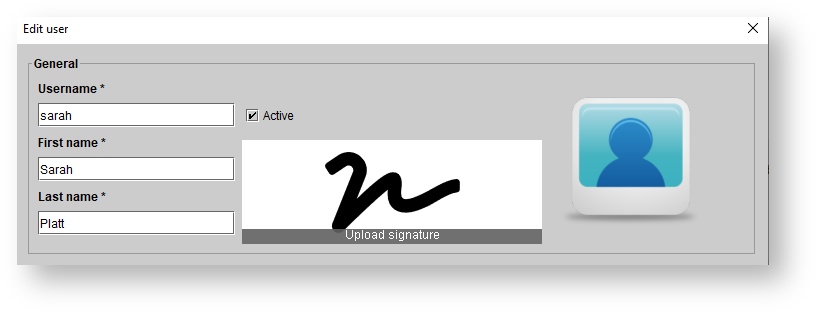
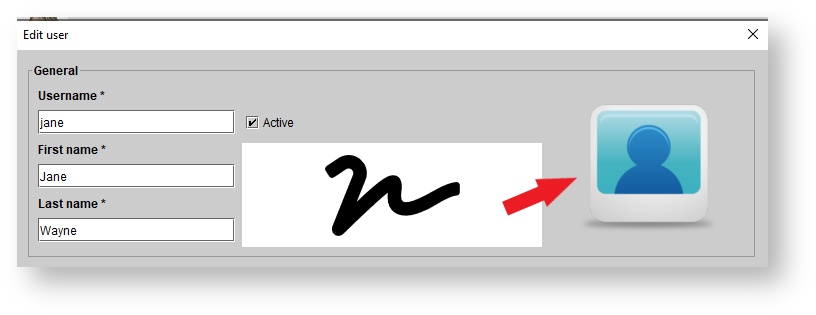
- At Setup > User administration > Users, right-click the user whose signature you want to set, and select Edit details.
- The Edit user dialog will appear; in it, click on the signature placeholder.
- A new dialog will appear, prompting you to select a file from your library. Choose the scan.
- The Edit signature dialog will appear. In it, you can resize and rotate the page, and drag the bounding box over the appropriate signature.
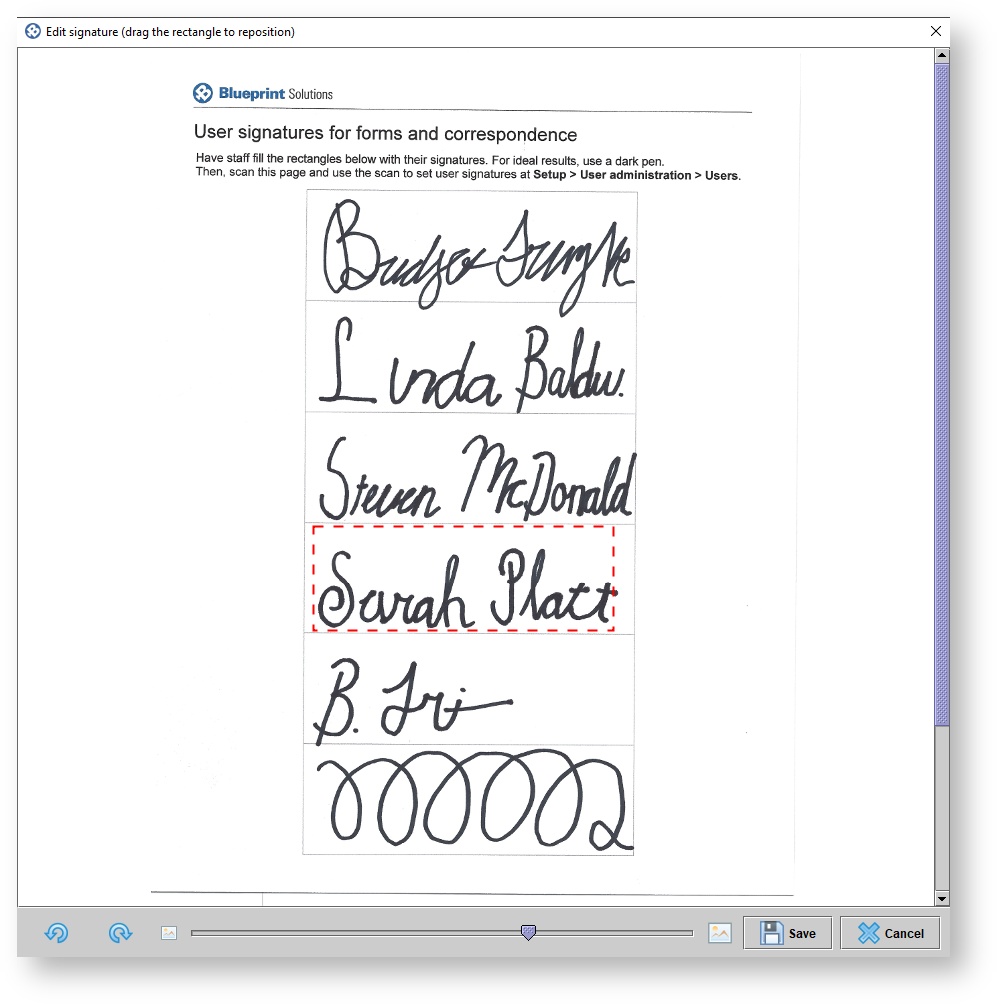
- When everything looks good, click Save.
Uploading a user photo
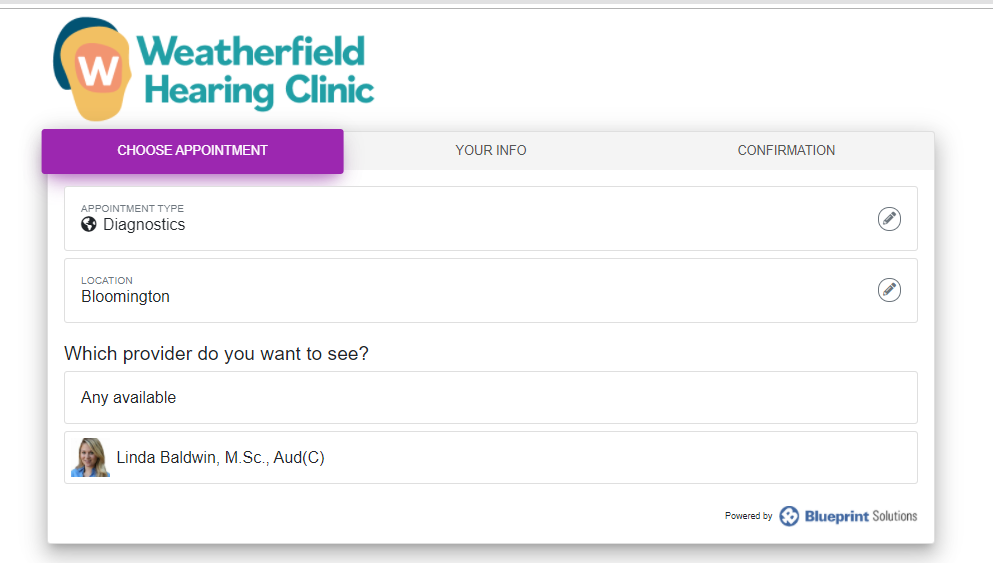
Optionally, upload user photos for providers. This photo will be displayed at the online appointment booking portal, beside the provider's name.
At Setup > User administration > Users, right-click the user whose photo you want to set, and select Edit details.
- The Edit user dialog will appear; in it, click the photo frame icon on the right.
6. Choose the photo source (File, Mobile device, Webcam) and capture or upload the user's photo.
- Crop and edit the photo as necessary.
- Click Save.
- More information: Patient photos.