Setting up and using tablets
Overview
Your clinic can optionally use tablets with the online forms feature. If you have one or more tablets set up at your clinic location, you can send an online forms request to a tablet, for a patient to fill out at the clinic.
Additionally, if online forms are enabled and tablets are set up, tablets can be used to collect electronic signatures on regular forms, as an alternative to signature pads.
Setting up tablets
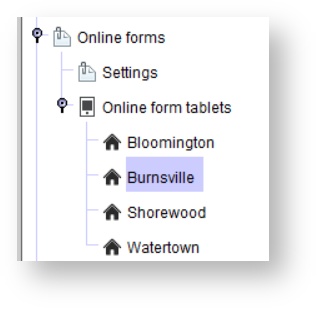
Only users with the Maintain online form settings user privilege can create or see tablets, and users can only create and see tablets at the locations they can access.
Step 1: Create the tablet in Blueprint OMS.
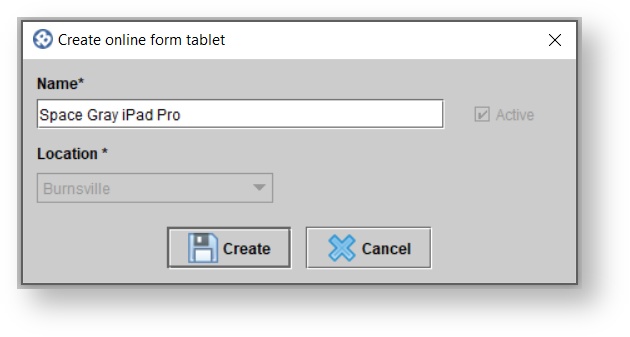
Under Setup > Online forms > Online form tablets, select the location for which you want to create a new tablet, and hit the CREATE NEW button to create a new tablet.
Step 2: Send the tablet its tablet URL and keep the URL accessible on the tablet.
Once you've created your tablet, copy its URL, and send the URL to the tablet. Then, on the tablet's browser, either bookmark the URL or set the URL as the browser's homepage.
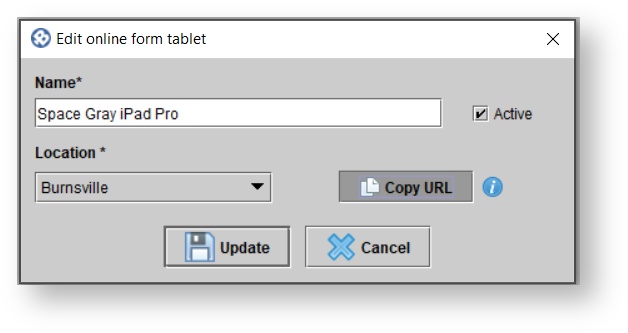
Since the ability to copy a tablet URL is restricted to those users with the Maintain online form settings user privileges, it is important that the tablet URL be kept somewhere prominent on the tablet—ideally, it should be the tablet's browser's homepage—so that users needing to send online forms to tablets can do so smoothly.
How forms requests appear on tablets
Once a tablet is set up with its unique tablet URL, any forms requests sent to that tablet will become available after the user completes the requisite authentication. Then, once the forms from that one request are completed, the page can be refreshed and the tablet will be able to receive further forms requests.
A tablet can only take one online forms request at a time; it cannot queue up requests.
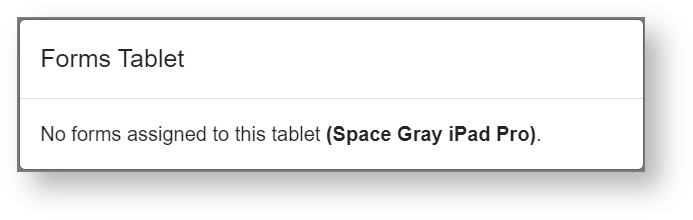
When there are no forms requests assigned the tablet:
When there is a forms request assigned to the tablet:

Disable autofill
For patient privacy, disable autofill on the tablets being used for online forms completion. Most standard browsers will disable autofill on online forms for you, but some will not; to be safe, take the additional step of disabling autofill in the browser.
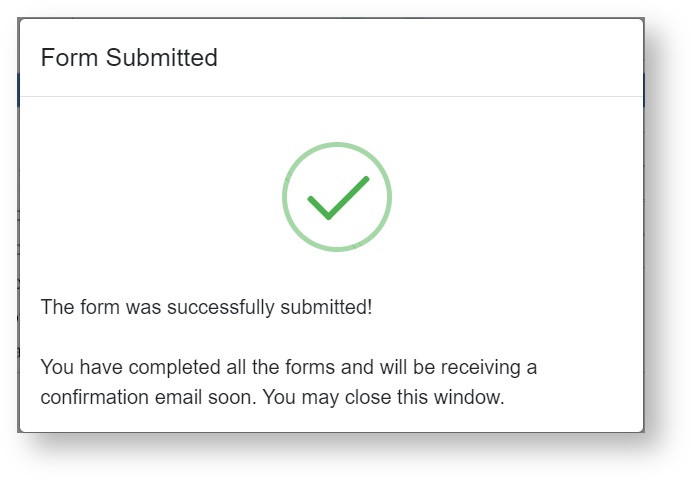
When a forms request is submitted from a tablet, you will see the below message, and then, refreshing the page will allow the tablet to view more forms:
Signing regular forms on tablets
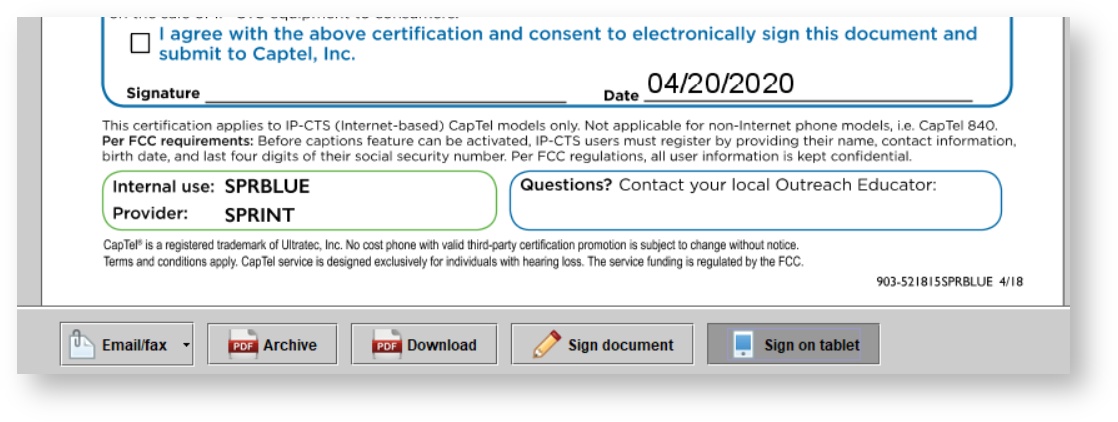
The SIGN ON TABLET option will be enabled only once online forms are enabled.
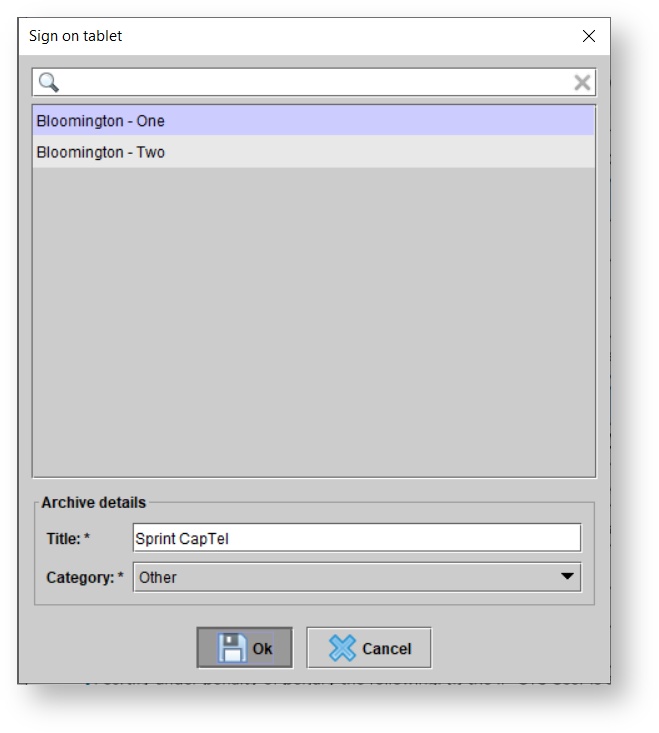
Forms with eSignature fields can be sent to tablets for signing. To do this, hit the SIGN ON TABLET. Then, in the Sign on tablet dialog, choose the tablet on which the form will be signed, the title of the document that will be archived to the patient's Documents tab, and the document category under which it will be archived.
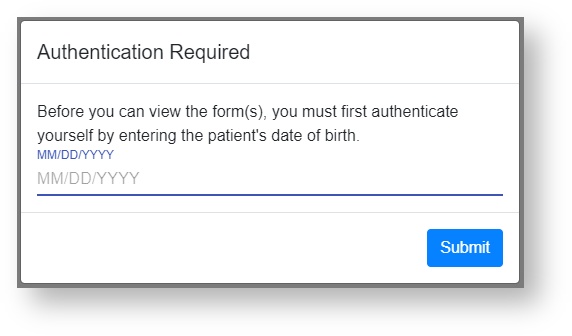
Then, on the tablet, at the tablet's unique URL, you will see that a new form is assigned to the tablet. If the patient associated with the form has a date of birth on file, the signer will have to authenticate by entering the birthday. The signer can then review, fill, and submit the form.

Then, the signed document will appear in the patient's Documents tab.
