Overview of filtering appointments
Appointments can be filtered to display a subset of appointments. Use the Filter by drop-down menu in the upper, left-hand area of the Scheduling screen to filter appointments by:
- People
- Resources
- Event type
Filtering by people
On the Scheduling screen, click the Filter by drop-down menu, and select People.
Select the check box next to the desired provider(s) to see appointments assigned to the provider(s).
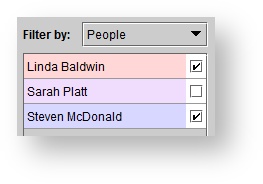 Colors for providers can be adjusted within the Setup menu. See: Managing users for more information.
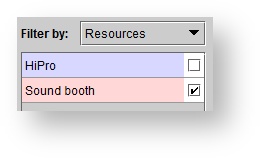
Filtering by resource
On the Scheduling screen, click the Filter by drop-down menu, and select Resources.
Select the check box next to the desired resource(s) to see appointments assigned to the resource(s).
To color code the appointments by appointment type, but keep the filtering by provider or resource, click the Color by appointment type check box.
Filtering by event type
On the Scheduling screen, click the Filter by drop-down menu, and select Event type.
Select the check box next to the desired event type(s) to see appointments assigned to the event type(s).
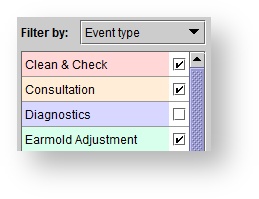 Event type colors can be adjusted within the Setup menu. See: Setting up event types for more information.
Filtering by appointment status
On the Scheduling screen, click the Status drop-down menu.
Select a status option to see only events with the designated status.
The appointment status filter can be applied on top of other filters (e.g. people, resource, event type). See: Editing existing appointments for more information.