Generating hearing loss assessment reports
- On the Patient browser tab, open the patient’s file.
- Click the Audiology tab.
- On the Audiology tab, click on an assessment date within the Audiological history margin.
- Right-click the assessment date.
- Select one of the following options:
- Hearing Assessment (2 page assessment results report)
- Physician Report Hearing Assessment (2-page assessment results report with a cover letter to the referring physician)
- Hearing Assessment Basic (1 page assessment results report)
- Hearing Loss Assessment Tymp Graph (1 page assessment results report with tymp graph, comments and recommendations section)
- Hearing Assessment Tymp AR (1 page assessment results report with tymp scores and no graph)

Or
- On the Patient browser tab, open the patient’s file.
- Click the Audiology tab.
- On the Audiology tab, click on an assessment date within the Audiological history margin.
- Once an date is selected, click Print
- Select one of the following options:
- Hearing Assessment (2 page assessment results report)
- Physician Report Hearing Assessment (2-page assessment results report with a cover letter to the referring physician)
- Hearing Assessment Basic (1 page assessment results report)
- Hearing Loss Assessment Tymp Graph (1 page assessment results report with tymp graph, comments and recommendations section)
- Hearing Assessment Tymp AR (1 page assessment results report with tymp scores and no graph)

Editing audiology reports
- On the Patient browser tab, open the patient’s file.
- Click the Audiology tab.
- On the Audiology tab, click on an assessment date within the Audiological history margin.
- Right-click the assessment date.
- Click on a hearing assessment report
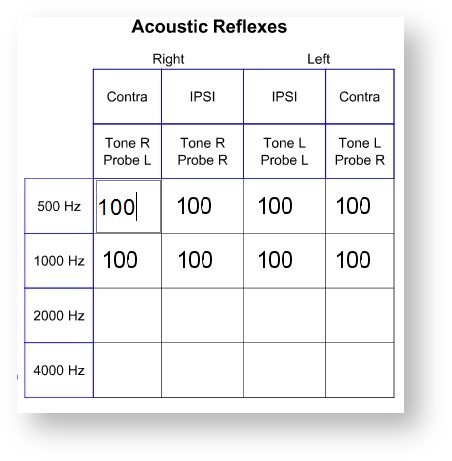
- To edit a report click into any cells to make any adjustments. To edit the speech scores or acoustic reflex scores you can click in the boxes and make your changes
7. On the right had side you will see what categories are available for text snippets. To use the text snippets, double click on the category.

5. A pop-up window will appear, with the text snippets listed on the right-hand side.
6. Double-click or drag and drop a snippet or type the "Auto text" shortcut and hit enter on your keyboard. This will add the text snippet to the report.

7. Click save
Create a new text snippet or edit a text snippet in the Setup Menu. See: Text Snippets for more information.
Signing reports electronically
- Click SIGN DOCUMENT.
- From the Sign document dialog box, check the Audiologist Signature box, and click Sign.

- When the audiologist has finished signing the signature pad, click Done.

- From the Sign document dialog box, check the Patient Signature box, and click Sign.
.png?version=1&modificationDate=1375738624525&cacheVersion=1&api=v2&width=570&height=223)
- When the patient has finished signing the signature pad, click Done.

When the signature fields have been signed, click Done.
 The signatures appear electronically on the form. Archive the document on the patient's file. See: Audiology reports.
Archiving reports as PDFs
There are multiple ways to extract the report out of Blueprint. Choose from one of the following options:
- Click the
 button to Archive the report under the patient Documents tab.
Within the Add document: Physician Report Hearing Loss Assessment dialog box, input a Title, select a Category, and optionally add an additional Description and Status.

Click Save.
- Click the Save
 icon in the top left-hand corner to save the report to your computer.
 - Click the Print
 icon in the top left-hand corner to print the report.
 - Click the
 button to download the report as a pdf to your computer.
Saving reports as editable forms
Documents in Blueprint can be archived for editing at a later time. To do this:
- Click the SAVE EDITABLE FORM button to save the report for editing at a later time under the patient Documents tab.
Within the Add document: Physician Report Hearing Loss Assessment dialog box, input a Title, select a Category, and optionally add an additional Description and Status.

Click Save.
- Click Ok on the Document successfully archived prompt.
Emailing an audiology report
The Hearing Loss Assessment or the Physician Report Hearing Loss Assessment can be emailed directly from Blueprint.
- Open the Hearing Loss Assessment or the Physician Report Hearing Loss Assessment
- Once in the report, click Email/fax
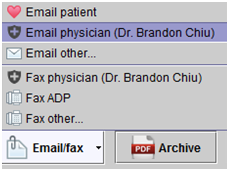
- Choose Email patient, Email physician, or Email other
- After selecting one of the above, it will ask whether future editing will be allowed

- Within the Add document: Physician Report Hearing Loss Assessment dialog box, input a Title, select a Category, and optionally add an additional Description and Status.

- A box will pop up verifying that the document has been archived
- If you have selected Email other, then select the e-mail recipient from the list or choose the Manual entry option and click Next
- The Enter message details screen will then appear. The subject can be changed and, optionally, an additional message can be entered
- Click Send
Faxing an audiology report
- Open the Hearing Loss Assessment or the Physician Report Hearing Loss Assessment
- Once in the report, click Email/fax
- Choose Fax physician, Fax Insurer, or Fax other
- After selecting one of the above, it will ask whether future editing will be allowed
- Within the Add document: Physician Report Hearing Loss Assessment dialog box, input a Title, select a Category, and optionally add an additional Description and Status

- A box will pop up verifying that the document has been archived
- If you have selected Fax other, then select the e-mail recipient from the list or choose the Manual entry option and click Next
- The Enter message details screen will then appear. The subject can be changed and, optionally, an additional message can be entered. Then click Next

- The Select correspondence details box will pop up and allow you to choose a fax cover page or the option to send the fax without a cover page

- Click
- The Physician Report Hearing Assessment will then show with the option to
- Optionally, click the Save icon in the top left-hand corner to save the report to your computer.
- Optionally, click the Print icon in the top left-hand corner to print the report.
- Optionally, click the Save