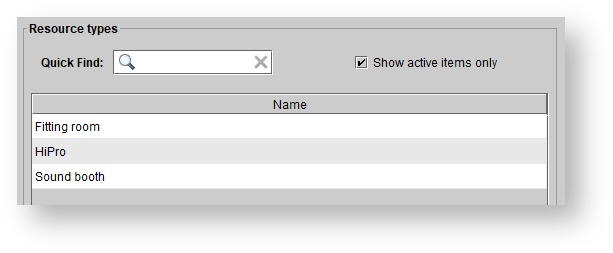
Viewing the list of resource types
- Click the Setup button on the main toolbar.
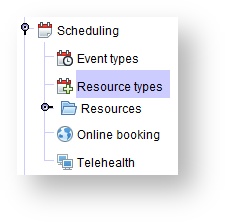
- Double-click Scheduling (or click the magnifying glass on the left to expand the menu).
Click Resource types.
Creating a new resource type
Click the Setup button on the main toolbar.
Double-click Scheduling (or click the magnifying glass on the left to expand the menu).
- Click Resource types
- Click CREATE NEW.
In the Create resource type dialog box, enter the reource Name
- Click Create.

Editing a resource type
Click the Setup button on the main toolbar.
Double-click Scheduling (or click the magnifying glass on the left to expand the menu).
- Click Resource types
In the Resource types panel, double-click on the desired resource, or click on the resource and select EDIT DETAILS.
In the Edit resource type dialog box, edit the event details as needed.
Click UPDATE.
Deactivating/Reactivating a resource type
Click the Setup button on the main toolbar.
Double-click Scheduling (or click the magnifying glass on the left to expand the menu).
Click Resource types
In the Resource types panel, double-click on the desired resource, or click on the resource and select EDIT DETAILS.
In the Edit resource type dialog box, un-check the Active check box.
Click UPDATE.

Overview
To keep track of clinic resources such as rooms and instruments, you can create resource types and resources in Blueprint OMS, to associate with event types and events respectively. When an event type is set to have a required resource type, then users will not be able to create events of that type without also reserving a resource of the required type from the event's location. By default, resources cannot be double-booked; this gives clinic a safeguard against double-booking resources.
Setting up resource types
At Setup > Scheduling > Resource types, you will find the list of resource types in your system. Here, users with the Maintain resource types user privilege will be able to create, edit, and deactivate resource types.
| Note |
|---|
In a given location, different resources of the same type will be equally good for satisfying an event type's resource type requirement. If the "Hearing test" event type, for example, requires "Sound booth" as a resource type, and "Sound booth 1" and "Sound booth 2" are "Sound booth"-type resources, then a user will be create a hearing test event by reserving either Sound booth 1 or Sound booth 2. For this reason, it is not recommended to have a resource type for "Other"; if "Verifit 1" and "Consultation room 1" are both "Other"-type resources, they will be equally good for satisfying the "Other" resource type requirement for an appointment type. This is not helpful for keeping track of resource requirements and for avoiding double-booking or resources. |
Creating a resource type
- At Setup > Scheduling > Resource types, click
.Status title Create new - The Create resource type dialog will appear. In it, enter a name for the resource type.

- Click
.Status title Create
Editing, deactivating, or reactivating a resource type
- At Setup > Scheduling > Resource types, double-click on the resource type. To see the inactive resource types, uncheck Show active items only in the Resource types pane.
- The Edit resource type dialog will appear. In it, change the resource type's name or active status.

- Click
.Status title Update
Setting up resources
Under Setup > Scheduling > Resources, you can view the resources set up for each location. Users with the Maintain resources user privilege will be able to create, edit, deactivate, and reactivate resources.


| Note |
|---|
In a given location, different resources of the same type will be equally good for satisfying an event type's resource type requirement. If the "Hearing test" event type, for example, requires "Sound booth" as a resource type, and "Sound booth 1" and "Sound booth 2" are "Sound booth"-type resources, then a user will be create a hearing test event by reserving either Sound booth 1 or Sound booth 2. For this reason, it is not recommended to have a resource type for "Other"; if "Verifit 1" and "Consultation room 1" are both "Other"-type resources, they will be equally good for satisfying the "Other" resource type requirement for an appointment type. This is not helpful for keeping track of resource requirements and for avoiding double-booking or resources. |
Creating a resource
- At Setup > Scheduling > Resources > your location, click
.Status title Create new - The Create resource dialog will appear. In it, name the resource, set the resource type, and select whether double-booking will be allowed.

- Click
.Status title Create
Editing, deactivating, or reactivating, a resource
- At Setup > Scheduling > Resources > your location, double-click on the resource. To see inactive resources, uncheck Show active items only in the Resources pane.
- The Edit resource dialog will appear. In it, change the resource's name, active status, resource type, location, or double-bookability.

- Click
.Status title Update
| Panel | ||||||
|---|---|---|---|---|---|---|
| ||||||
|