Overview
Before products or services can be sold to a patient or information entered into a file, the patient must be created in the system.
There are three ways to enter patients into the system.
- Manually from the Patient Browser >
.Status title Create patient - Converting a QuickAdd to a full patient.
- Processing an incoming online forms request.
This page covers the manual method.
| Info | ||
|---|---|---|
| ||
Do not enter or update patient information directly in QuickBooks, as these changes will not be reflected in Blueprint OMS. |
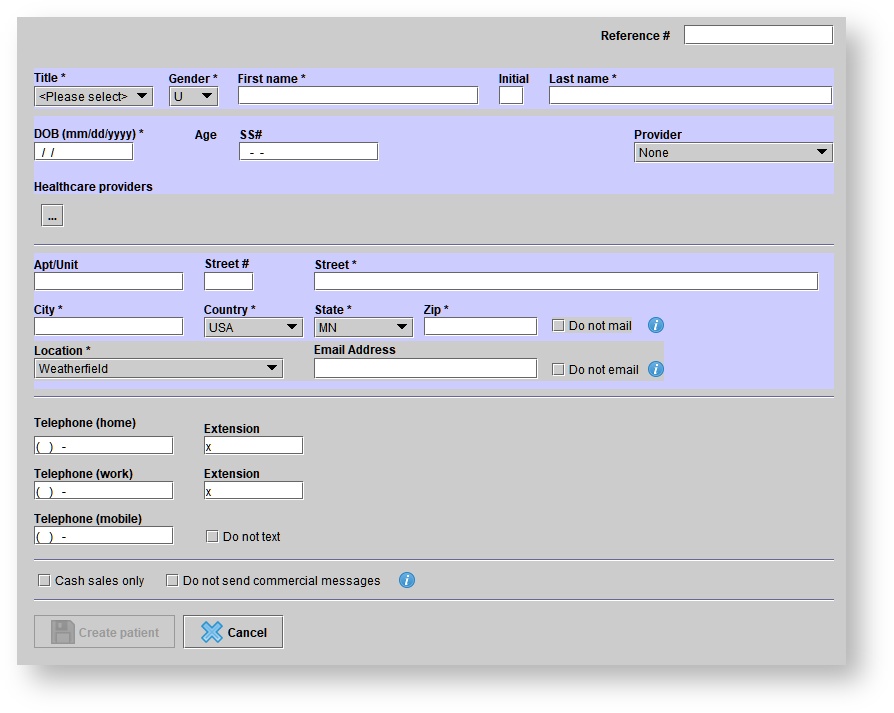
Manually creating a new patient file
On the Patient browser tab, click the
button.Status title Create patient You will then want to enter all required information.
| Tip |
|---|
Some fields on the Create patient screen are mandatory, indicated by an asterisk (*). Other fields must conform to a specific format (e.g. birth date, telephone numbers and postal codes). Fields that are missing mandatory information, or that contain information in an incorrect format, are highlighted in blue. |
Checkboxes
| Checkbox name | Checkbox function |
|---|---|
| Do not mail | Master switch for mail. If set, no mail will be sent to the patient. This includes manual marketing campaigns as well as automated marketing campaigns (print). |
| Do not email | Master switch for email. If set, no email will be sent to the patient. This includes appointment reminders, automated email marketing campaigns, invitations for online reviews, etc. |
| Do not text | If set, Blueprint will not send SMS messages to the patient. |
| Do not send commercial messages | If set, the patient will be excluded from all marketing campaigns marked as commercial. The same setting can be accessed in the patient's Marketing tab. |
| Cash sales only | If set, the patient's name will appear in red, instead of black, in the Patient browser. |
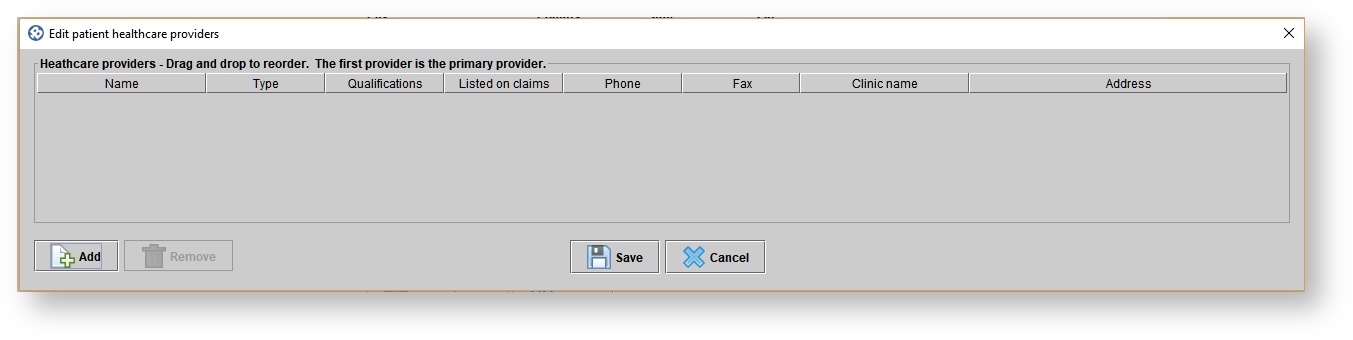
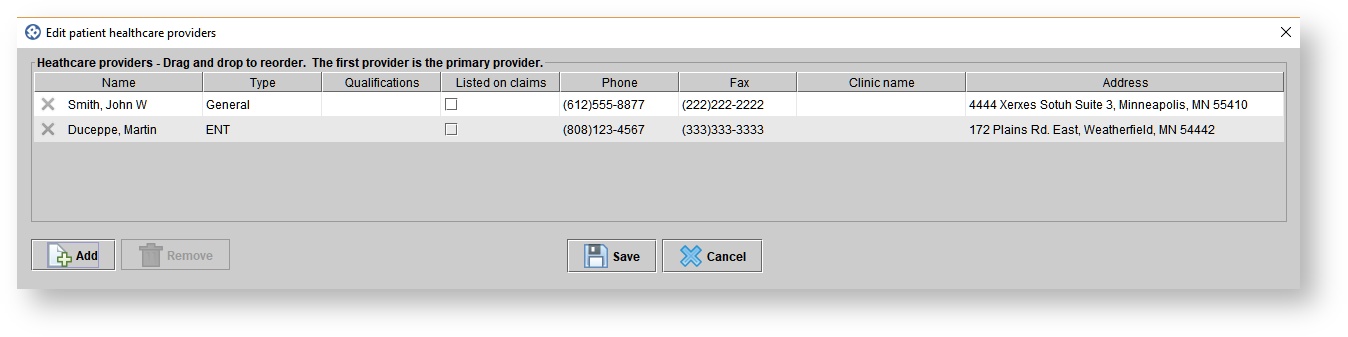
Selecting the patient's Healthcare providers.
| Anchor | ||||
|---|---|---|---|---|
|
On the Create patient screen, click on the
 box under Healthcare providers.
 Click the Add button to select a provider for the patient file.
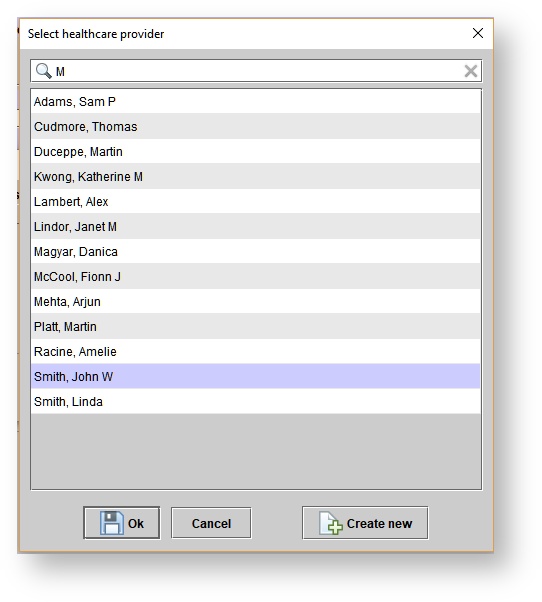
In the Select healthcare provider menu use the quick find field to search for the provider name
Highlight the provider you wish to add and click ok
| Tip |
|---|
If you do not see the healthcare provider you wish to add, click the Create new button to add a new provider to the list or create a new one in Setup. |
6. Additionally, click the Add button again to add another healthcare provider.
7. Click save.
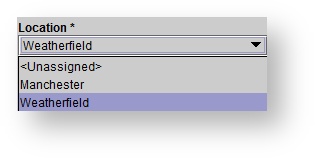
Selecting the patient's assigned location
On the Create patient screen, click the Location drop-down menu.
You can then Select a Location from the list
Saving new patient information
| Anchor | ||||
|---|---|---|---|---|
|
| Tip |
|---|
Once information entered in the mandatory fields is complete, the Create patient button is activated. |
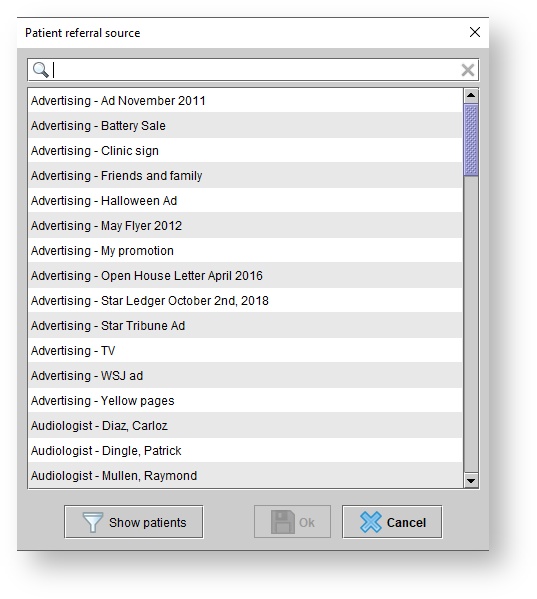
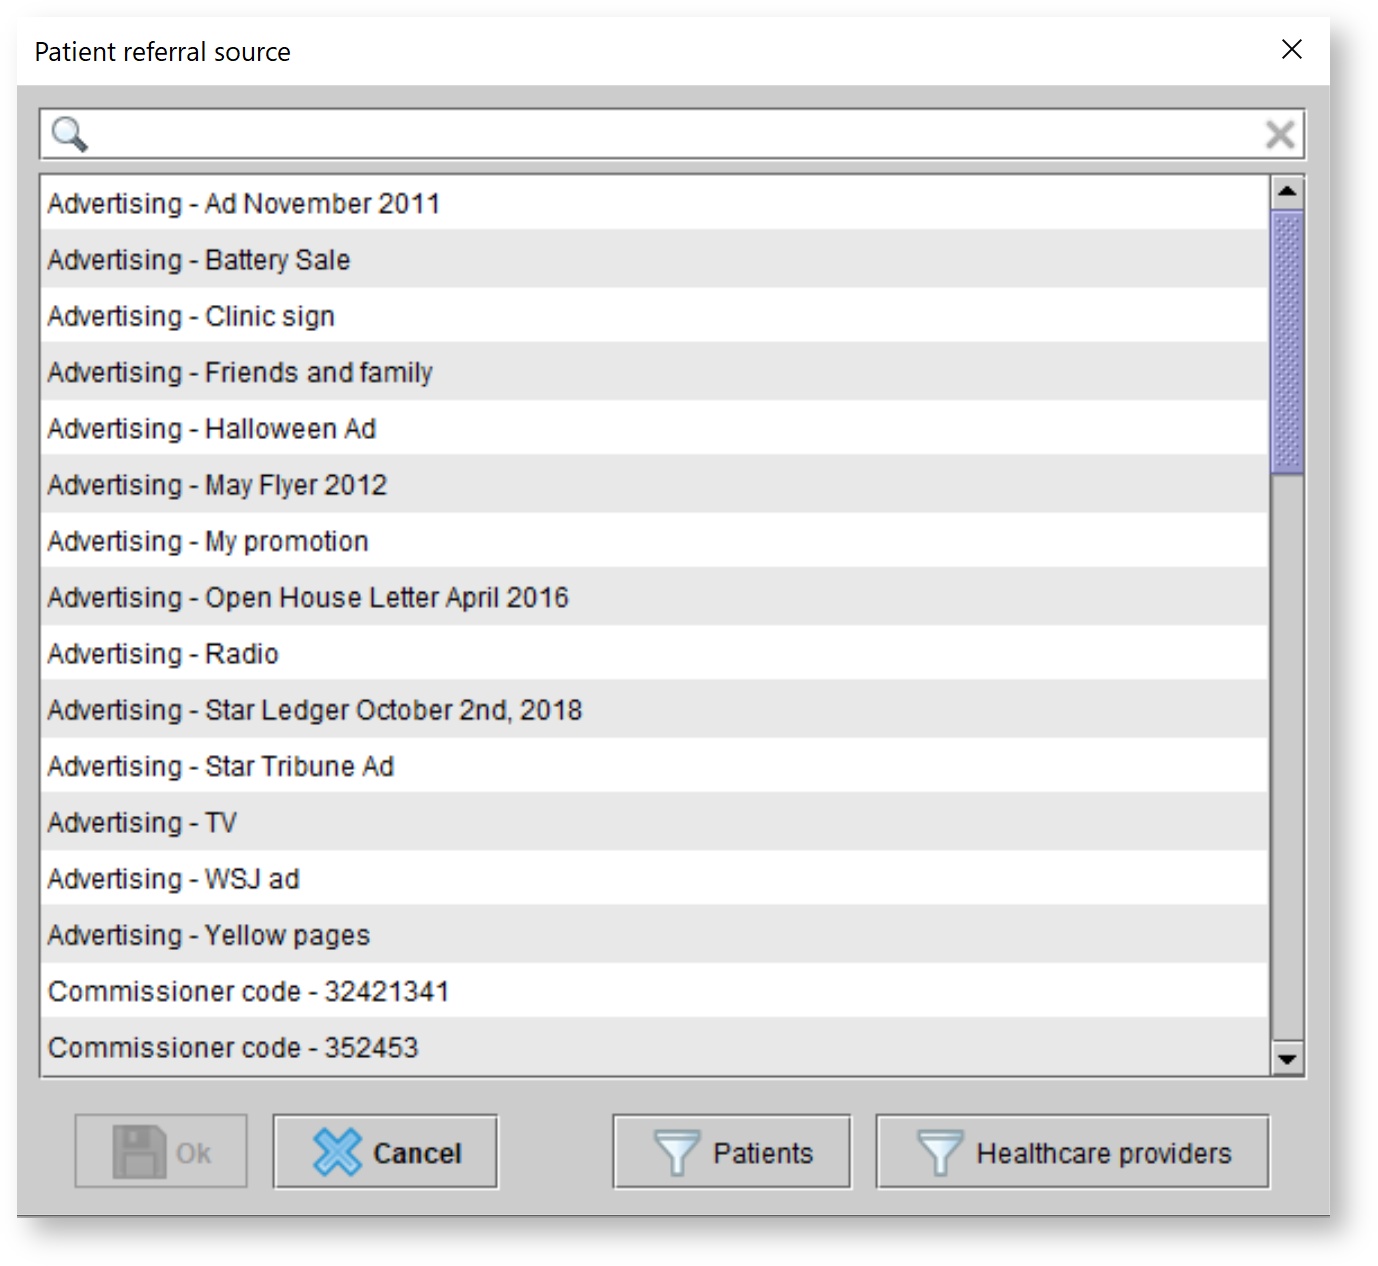
Then in the Patient referral source dialog box, set the patient's referral source.
2. Click
| Status | ||
|---|---|---|
|
| Note |
|---|
Each Referrer type requires at lease one secondary Referral source present in the Setup menu in order to be saved on a patient's file. See: Setting up referral types and sources. |
3. You will then be prompted to export the patient to Noah, you can do one of the following:
Click Yes to export the patient to Noah.
To cancel the prompt, click No. For more information, see: Entering patient hearing assessments.
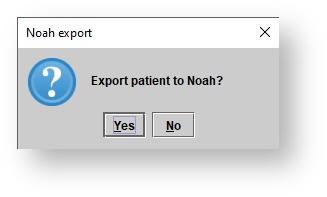
Note Ensure the bottom left-hand corner of the screen indicates Ready. to ensure the patient file is created in Blueprint, prior to exporting the patient file to Noah.
| Info | ||
|---|---|---|
| ||
When the patient is saved in Blueprint OMS, a new customer entry is created in QuickBooks. The Create patient tab is closed in Blueprint, and the patient’s file opens in a new tab. |
Updating patient information
On the Patient browser tab, open the patient’s file by highlighting the patient and selecting open at the bottom of the screen.
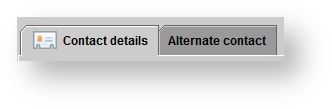
Once the patients file is open you select the patients Details tab.
From the Contact Details tab, you can adjust the patient's contact information as necessary.
4. You can Click
| Status | ||
|---|---|---|
|
| Note | ||||
|---|---|---|---|---|
The
|
| Tip | ||
|---|---|---|
| ||
Patient details can be easily entered by "swiping" their health card through a standard magnetic card reader when creating a new patient file. Save time, and reduce data entry errors! The card reader must be able to read Track 1 and Track 2 and have a keyboard emulation capabilities. One model that we have tried and works well is the MagTek 21040110. This feature currently works with health cards in Ontario and BC. |
Marking patients inactive or deceased
| Anchor | ||||
|---|---|---|---|---|
|
On the Patient browser tab, open the patient’s file by highlighting the patient and selecting open at the bottom of the screen.
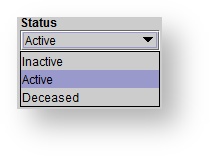
Click on the Details tab, go to the Status drop-down menu.
You can then click on Inactive or Deceased.
5. Click
| Status | ||
|---|---|---|
|
| Tip | ||||
|---|---|---|---|---|
Click
|
To undo this action go to the Patient Browser, select
 .
.Find your patient and open the patient’s file by highlighting the patient and selecting open at the bottom of the screen.
Once the patients file is open you select the patients Details tab.
From the Contact Details tab, go to the Status drop-down menu.
5.You can then click on Active.
6.Click
| Status | ||
|---|---|---|
|
| Panel | ||||||
|---|---|---|---|---|---|---|
| ||||||
|
| Panel | ||||||||||||
|---|---|---|---|---|---|---|---|---|---|---|---|---|
| ||||||||||||
|
| Panel | ||||||
|---|---|---|---|---|---|---|
| ||||||
|