Overview of patient Insurers tab
Use the patient's Insurers tab to enter and view any existing insurers for the patient. Optionally, store scans of the patient's insurance cards there as well.
Setting a patient's insurer(s)
In the patient's Insurers tab, select
, enter information about the insured, as it would appear on the HCFA 1500 form. Ensure all required fields are filled in including patient Relationship, Insurer, Name, Gender, ID#, DOB, Street, City, Country, State, Zip, and Telephone.Status title Add Insurer Tip The Relationship filed indicates 'patient relationship to insured' as specified in box 6 on the HCFA 1500 form. Insured's policy and contact information should be entered in the fields below. Optionally, enter Policy #, Employer/School name, and Insurance plan/Program name. These fields are not required within Blueprint OMS, but if entered, will populate in box 9(a), box 9(b), and box 9(d) respectively on the HCFA 1500 form.
Note Several fields on this tab contain special formatting constraints:
- The Insurer drop-down menu contains a list of insurers that are currently setup in the system. For more information, see: Setting up insurers.
- The Name field must be formatted as 'Last, First, Middle' or 'Last, First.'
- The DOB field must be formatted as 'mm/dd/yyyy.'
- The Zip code must be formatted as '00000' or '00000-0000.'
- Click Save to save changes.
| Tip |
|---|
To add any additional insurance companies select Add insurer and repeat the above steps. The first insurer in the list is the primary insurer. |
Scanning insurance cards
- In the patient's Insurers tab, right-click on the insurer and select the Scan insurance card sub-menu, where you can select Front of card or Back of card.
The Morena source selector dialog will appear. In it, select the scanner and click
.Status title OK 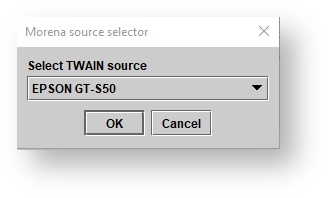
Set the scanner preferences and complete the scan. To crop the scanned image, click and drag the red image indicator. Optionally, rotate or magnify the image.
Click
.Status title Save Note Scanning additional insurance cards will replace the existing card attached to the insurer. Previous versions of insurance cards will remain archived in the patient's Documents tab.
Editing patient insurers
- On the Patient browser tab, open the patient’s file.
Click the Insurers tab.
On the Insurers tab, highlight the insurance company, right click and select edit details.
Click
to save changes.Status title Update Note The
button undoes any recent changes made to the insurance details, prior to the last update of information.Status title revert Warning Once insurance information is saved on a patient file, a subsequent adjustment to a patient's address or date of birth in the patient Details tab will not be reflected on the patient Insurers tab.
Deleting patient insurer(s)
- On the Patient browser tab, open the patient’s file.
Click the Insurers tab.
On the Insurers tab, highlight the insurance company, right click and select Deactivate.
| Panel | ||||||
|---|---|---|---|---|---|---|
| ||||||
|
| Panel | ||||||||||||
|---|---|---|---|---|---|---|---|---|---|---|---|---|
| ||||||||||||
|
| Panel | ||||||
|---|---|---|---|---|---|---|
| ||||||
|