Selecting loaned aids
- On the Patient browser tab, open the patient’s file.
- Click the Hearing aids tab.
Click on a hearing aid with On loan status.
Tip To select multiple loaned aids, press and hold the Control key (Ctrl) on the keyboard while clicking on the aids.
Generating loaner agreements
- Right-click the On loan aid and select Loaner agreement.
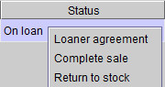
- An agreement will automatically populate within Blueprint.
| Tip |
|---|
| Utilize Use the default Loaner Agreementagreement within Blueprint OMS, or send a upload your clinic-specific agreement to the Blueprint Solutions support team to load into the systemyour system from the Setup > Templates > Forms menu. |
Signing loaner agreements electronically
| Status | ||
|---|---|---|
|
Documents enabled for electronic signing can be signed using a tablet or a signature pad.
Signing using a tablet
| Note |
|---|
To use a tablet for electronic signatures, the online forms feature needs to be enabled and a tablet needs to be set up at the patient's assigned location. For more information, see: Setting up online forms and Setting up and using tablets. |
- Click
.Status title Sign on tablet - The Sign on tablet dialog box will appear. Select a tablet to send the loaner agreement to, and set the title and category to archive the loaner agreement under. Then click
.Status title Ok 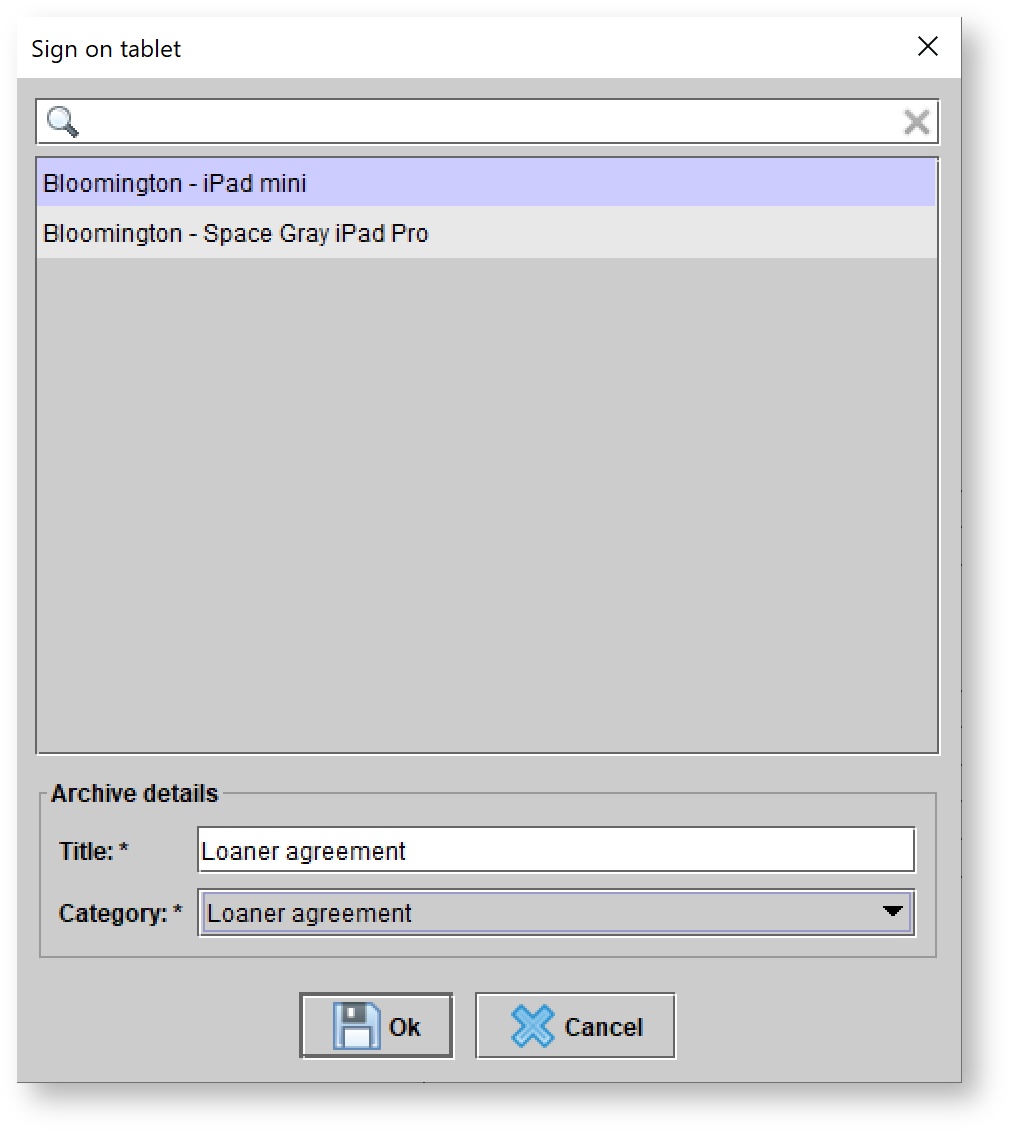
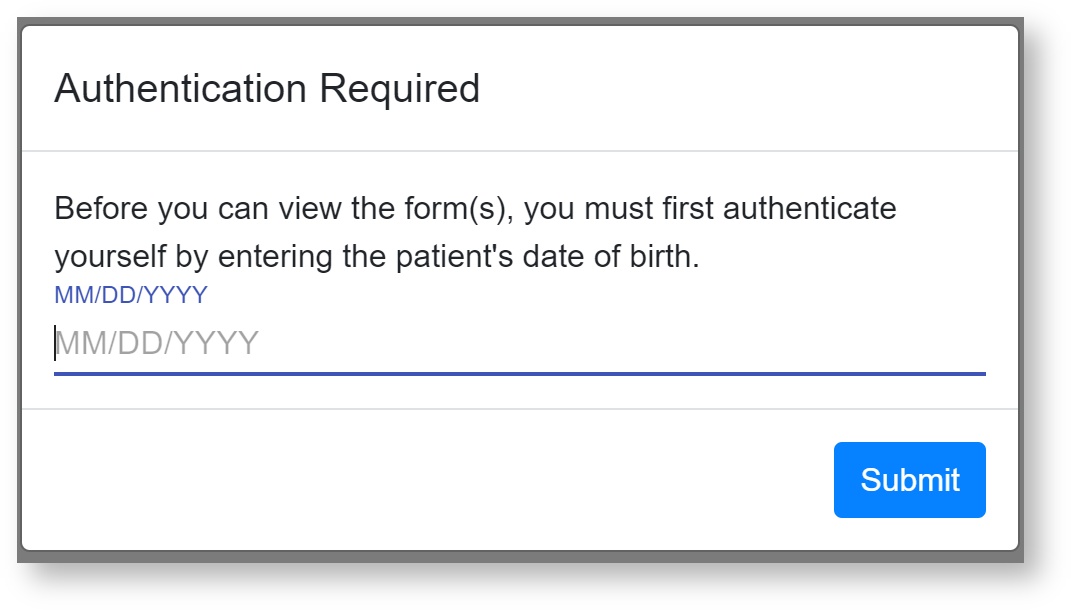
- On the tablet, enter the patient's date of birth.
- The loaner agreement will appear on the tablet. Click into the rectangle that says Sign here.

- Have the patient enter their signature and hit
. Then tapStatus colour Blue title Create
on the form.Status colour Green title Submit 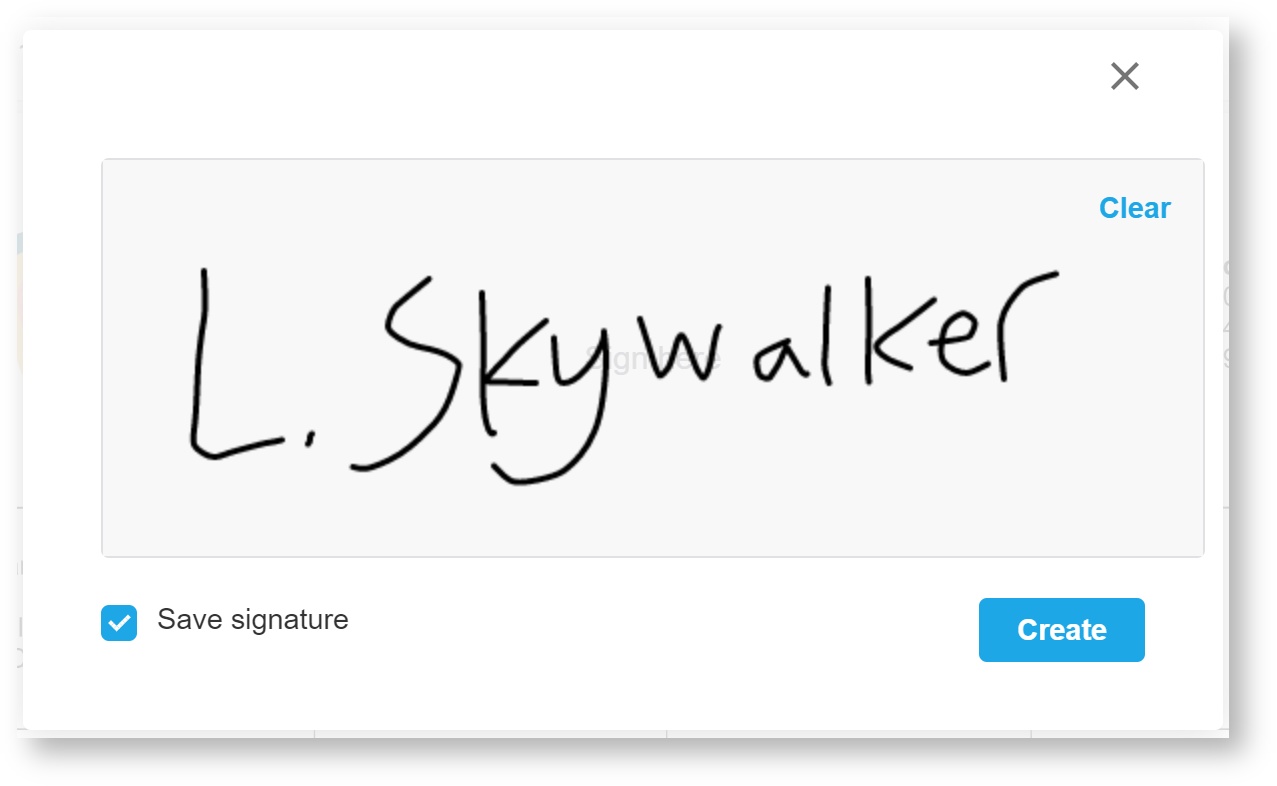
Then, the signed loaner agreement will appear in the patient's Documents tab.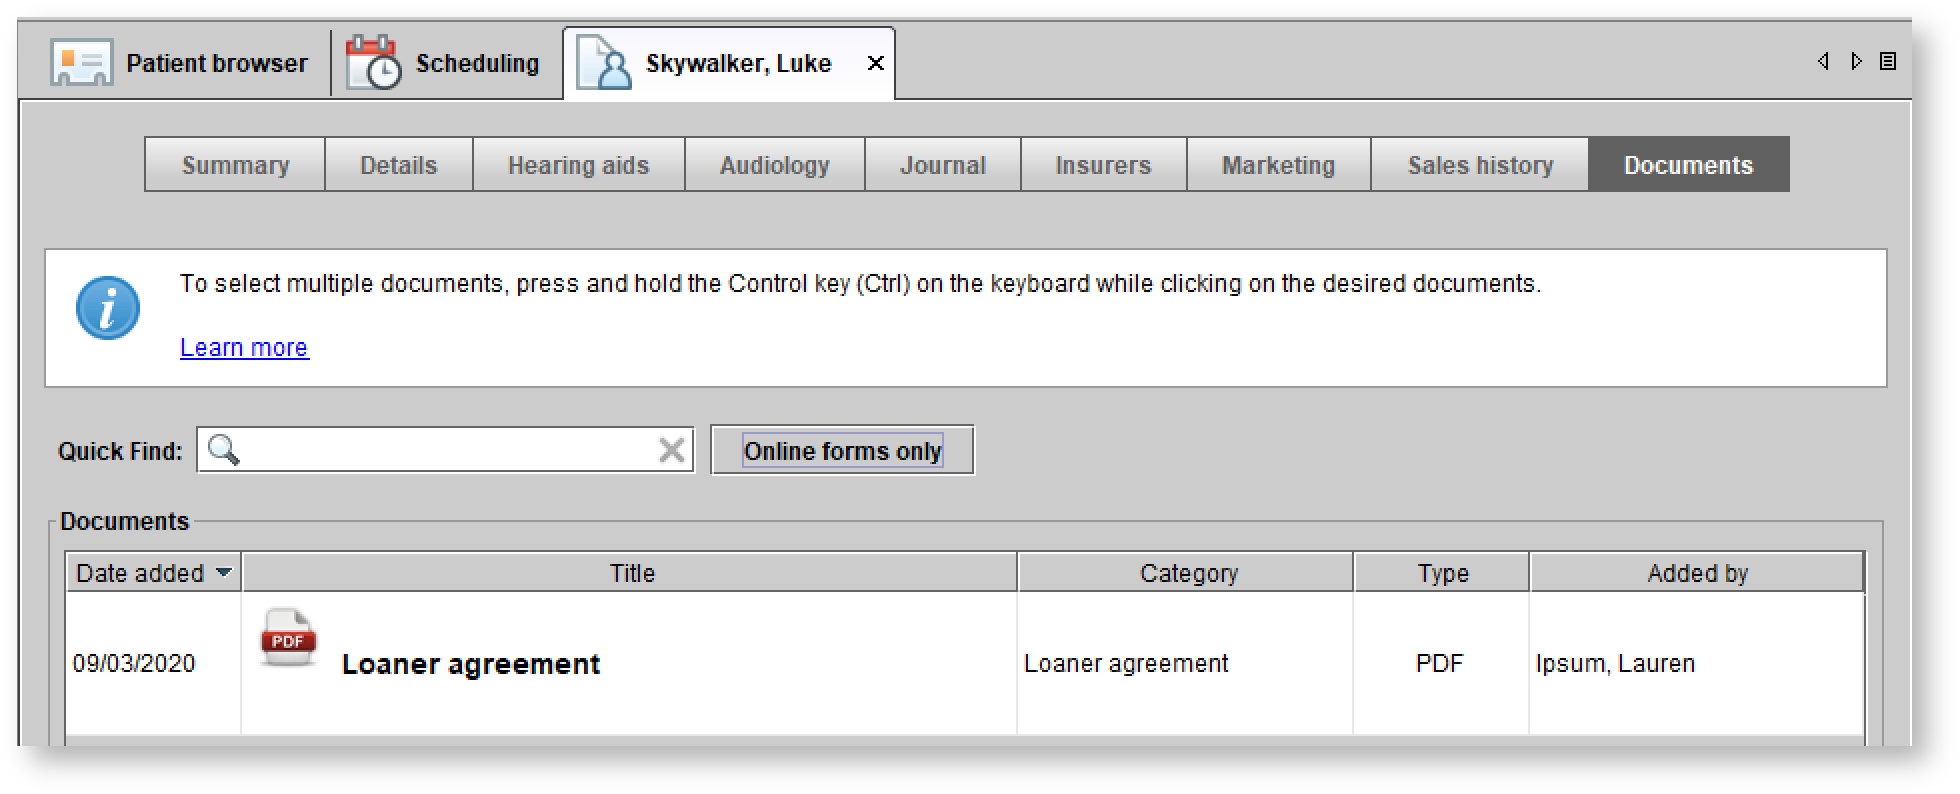
Signing using a signature pad
| Note |
|---|
| US-based customers can order signature pads here: Signature Pad Order Form. |
- Click
.Status title Sign document - As the patient signs the signature pad, the signature will appear within the Sign document dialog box.
When the patient has finished signing the signature pad, click Done.
Note .
Archiving loaner agreements
| Anchor | ||||
|---|---|---|---|---|
|
- Click the
button to archive the agreement under the patient Documents tab.Status title Archive as PDF - Within the Add document dialog box, input set a Title, select a Category, and optionally add an additional a Description and a Status.
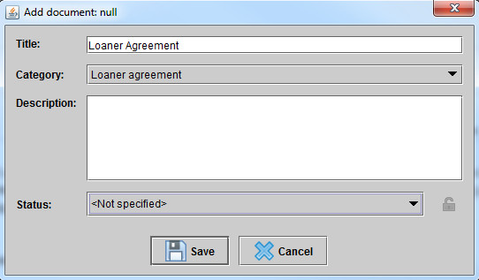
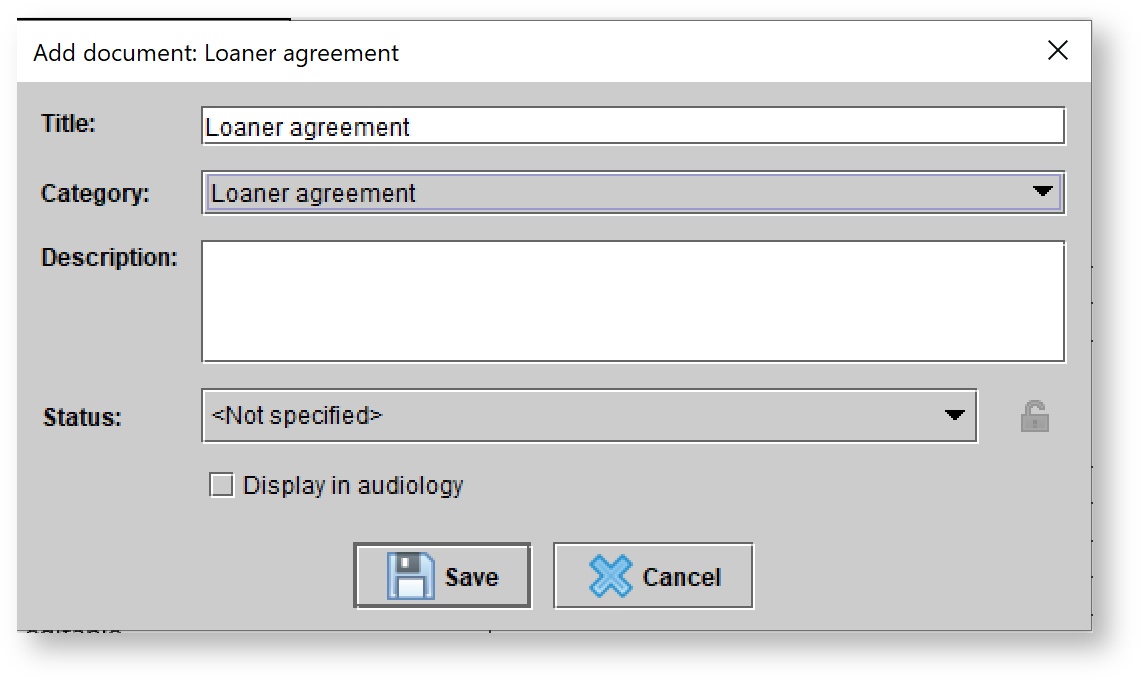
- Click Save.
Extracting the loaner agreement out of Blueprint OMS
There are two ways to extract the loaner agreement out of Blueprint OMS.
- Click the Save
 icon in the top left-hand corner to save the agreement to your computer.
 - Click the Print
 icon in the top left-hand corner to print the agreement.
| Panel | ||||||
|---|---|---|---|---|---|---|
| ||||||
|
| Panel | ||||||||||||
|---|---|---|---|---|---|---|---|---|---|---|---|---|
| ||||||||||||
|