Receiving hearing aids
Locate an 'Ordered' hearing aid or orderable item by doing one of the following:
On the Patient browser tab, open the patient's file, and click the patient's Hearing aids tab.
Click
on the main toolbar.Status title orders
Click on an aid or item in 'Ordered' status.
Receive the hearing aid or item by doing one of the following:
Right-click the aid/item and select Receive aid or Receive aid(s) with bill.
Click the drop-down menu below the list of hearing aids and items and select Receive aid or Receive aid(s) with bill. Click Ok.
Receiving aid(s) without bill
| Note |
|---|
The cost (manufacturer price) for the hearing aid or orderable item, used for reporting purposes, will default to the cost present in the Setup menu. See: Setting up hearing aids and options or Setting up orderable items for more information. A bill can be entered at a later time to adjust the cost. See: Entering bills for more information. |
On the Receive item(s) tab, click in the Serial field to enter the serial number.
Optionally, click in the Battery field to select the battery size from the drop-down menu, click in the Warranty expiry and L&D Warranty fields to select the desired date from the calendar, click in the Color field to designate a color, and click in the Notes field to enter additional information.
To save the changes, click out of the cell, or click Enter on the keyboard.
Click Save.
Tip The
button will automatically generate the serial number, if the aid package is scanned using a barcode reader. Click Ok when done performing the scan.Status title Scan serial Note The received aids/items appear in the patient's Hearing aids tab and within the Orders screen, found by clicking the
button on the main toolbar. A journal entry records the aid(s)/item(s) have been received.Status title orders
Receiving aid(s) with bill
| Info | |
|---|---|
| title | QuickBooksReceiving items with a bill will transfer a manufacturer bill to the Vendor center in QuickBooks. |
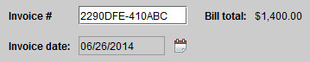
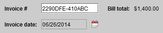
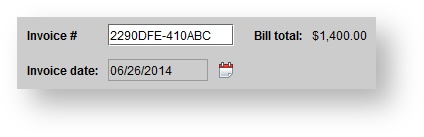
On the Receive aid(s) tab, enter the Invoice # from the manufacturer. Optionally, click the Location drop-down menu to adjust the location, and click the Invoice date field to select the desired date from the calendar.
Click in the Serial field to enter the serial number.
Optionally, click in the Battery field to select the battery size from the drop-down menu, click in the Warranty expiry and L&D Warranty fields to select the desired date from the calendar, click in the Color field to designate the color, and click in the Notes field to enter additional information.
Optionally, click in the Cost field to adjust the manufacturer price.
Tip The default cost (manufacturer price) for the aid or item can be adjusted in the Setup menu. See Setting up hearing aids and options or Setting up orderable items for more information. To save the changes, click out of the cell, or click Enter on the keyboard.
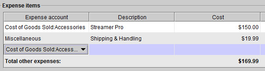
Optionally, add additional expense items by clicking in the Expense account field, within the Expense items panel, and selecting an account from the drop-down menu. Click in the Description field to type an item description. Click in the Cost field to enter item cost. To save the changes, click out of the cell, or click Enter on the keyboard.
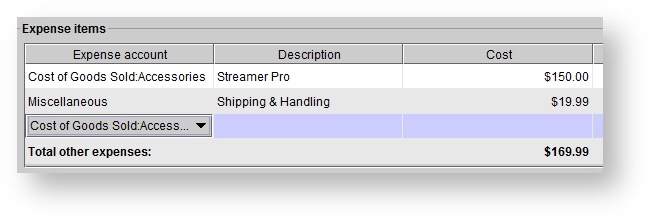
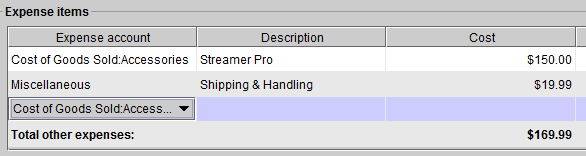
Tip Add more than one expense item, by clicking into another Expense account field.
Click Save.
Tip The
button will automatically generate the serial number, if the package is scanned using a barcode reader. Click Ok when done performing the scan.Status title scan serial #s Note The received aids/items appear in the patient's Hearing aids tab and with the Orders screen, found by clicking the
button on the main toolbar. A journal entry records the aid(s)/item(s) have been received.Status title orders
Entering bills
| Note |
|---|
Entering a bill for a hearing aid or orderable at a later time, intended for an aid or item which was initially received without a bill, will allow for adjusting the cost of the aid/item for reporting purposes. |
Click the Accounting drop-down menu and select Enter bill.
Click the Manufacturer drop-down menu and select the desired manufacturer. A list of hearing aids, which have been received without a bill, will appear.
In the Drag or double-click to select hearing aid(s) dialog box, click the Hearing aids, Repair orders, or Stock aids tab.
Click on the desired hearing aid, and do one of the following:
Drag-and-drop the aid to the Selected aid(s) panel.
Double-click.
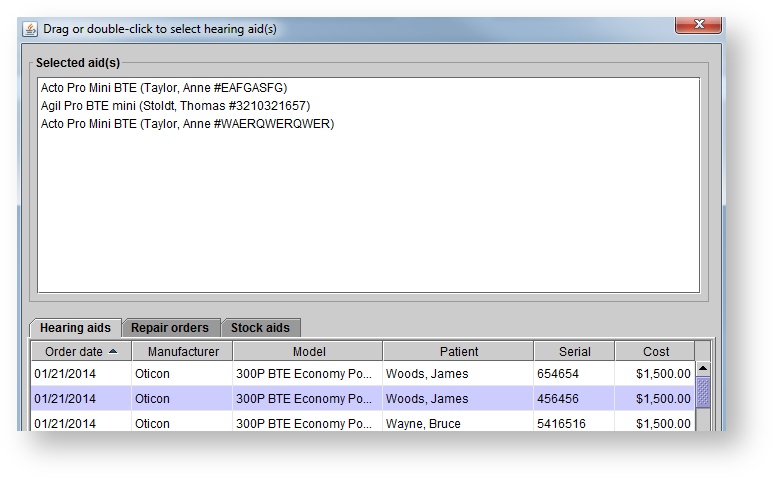
Tip To select multiple aids, press and hold the Control key (Ctrl) on the keyboard while clicking the desired aids.
Click Save.
Enter the Invoice # from the manufacturer, and optionally click in the Invoice date field to select the desired date from the calendar.
Optionally, click in the Cost field to adjust the manufacturer price.
Tip The default cost (manufacturer price) for the aid can be adjusted in the Setup menu. See: Setting up hearing aids and options for more information.
To save the changes, click out of the cell, or click Enter on the keyboard.
Optionally, add additional expense items by clicking in the Expense account field and selecting an account from the drop-down menu. Click in the Description field to type an item description. Click in the Cost field to enter item cost. To save the changes, click out of the cell, or click Enter on the keyboard.
Tip Add more than one expense item, by clicking into another Expense account field.

Click Save.
| Info | |
|---|---|
| title | QuickBooksEntering a bill will transfer a manufacturer bill to the Vendor center in QuickBooks. |
| Panel | ||||||
|---|---|---|---|---|---|---|
| ||||||
|
| Panel | ||||||||||||
|---|---|---|---|---|---|---|---|---|---|---|---|---|
| ||||||||||||
|
| Panel | ||||||||||||
|---|---|---|---|---|---|---|---|---|---|---|---|---|
| ||||||||||||
|