Versions Compared
Key
- This line was added.
- This line was removed.
- Formatting was changed.
Exporting patients to Noah
| Tip |
|---|
| Upon creating a new patient in Blueprint OMS, the patient can be exported to Noah. See: Entering new patients. The export can also occur at a later time. |
- On the Patient browser, do one of the following:
- Highlight a patient name.
- Open a patient file.
From the Noah drop-down menu, select Export patient to Noah.
 Image Removed
 Image Added
3. A confirmation message appears when the patient is successfully exported
| Tip |
|---|
| It may take up to 15 seconds to see the patient file in Noah. |
| Note |
|---|
| If the patient already exists in Noah, and already exists in Blueprint OMS, the two files will be automatically linked as long as the spelling of the patient's first name, last name, and date of birth are identical. |
Patient data that transfers from Blueprint OMS to Noah
- First name
- Last name
- Middle initial
- Gender
- Birthdate
- SSN
- Creation date
- Address
- City
- Zip
- Province
- Country
- Home telephone number
- Work telephone number
- Mobile telephone number
- Primary physician
Automatically importing audiometric data into Blueprint OMS
Open the patient file in Noah and perform the hearing assessment.
When complete, save the test results in Noah.
- The audiometric data automatically populates in Blueprint OMS within the patient’s Audiology tab.
| Tip | ||||
|---|---|---|---|---|
Click
|
Manually importing audiometric data into Blueprint OMS
If you need to import the audiometric data from Noah into Blueprint OMS at a later time you can follow the instructions below:
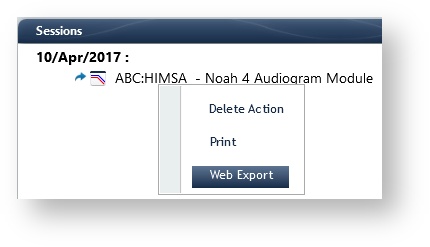
- Open the patient file in Noah
- R-click the hearing assessment
- Select Web Export
- The audiometric data will populate in Blueprint OMS within the patient’s Audiology tab.

Completing the data set
| Tip |
|---|
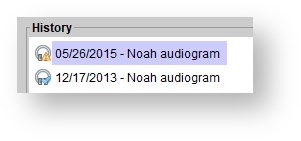
The  symbol next to the assessment date in the patient's Audiology tab indicates an incomplete data set. symbol next to the assessment date in the patient's Audiology tab indicates an incomplete data set. |
Click the date of Double-click on the assessment within the Audiological history marginin the History panel.
 Image Removed
2. Click
| Status | ||
|---|---|---|
|
 Image Added
3. In the Enter Edit test results dialog box, select the Provider, Test Method, hearing loss Severity, Type, and Shape.
4. Enter diagnostic codes as desired using the
| Status | ||||
|---|---|---|---|---|
|
| Tip |
|---|
Click the Copy |
5. Click
| Status | ||
|---|---|---|
|
 Image Removedto the left of the assessment date in the Audiological history margin indicates a complete
 Deleting the data set
. Image Removed
Deleting the data set
- Click the date of the assessment within the Audiological history margin under the patient's Audiology tab.
 Image Removed2. Click
 | Status | ||
|---|---|---|
|
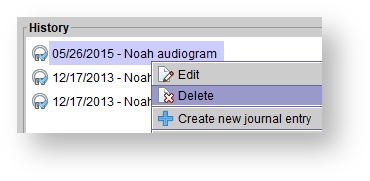
In the History panel, right-click on the data set you wish to delete, and select Delete.
 Image Added
| Panel | ||||||
|---|---|---|---|---|---|---|
| ||||||
|
| Panel | ||||||||||||
|---|---|---|---|---|---|---|---|---|---|---|---|---|
| ||||||||||||
|
| Panel | ||||||
|---|---|---|---|---|---|---|
| ||||||
