Editing appointment
Rightdetails
- In the Scheduling tab, right-click on the appointment.
- Select Change status.
- Select the new status.

Moving an existing appointment
- Hover the cursor over the appointment until it changes to the 4-way arrow cursor.
- Click the appointment and drag it to the new date and time.
- In the confirmation dialog box, do appointment select Edit details.
- The Edit event details dialog box will appear. In it, update the details as needed.
- To save the changes, click
.Status title Update event
Reschedule
In the Scheduling tab, right-click on the appointment, select reschedule.

| Note |
|---|
The rescheduling option will be visible if the appointment is today or in the past. It will be greyed out if the appointment has the status: arrived, in progress, or completed and if the time slot is in the future. |
Changing appointment status
| Anchor | ||||
|---|---|---|---|---|
|
In the Scheduling tab, right-click on the appointment, select Change status, and from the Change status menu, set the new status.

| Tip | ||||
|---|---|---|---|---|
To hide the appointment status icons, click the
|
Cancelling appointments
- In the Scheduling tab, right-click the appointment, select Change status, and set Cancelled as the new status.
- A prompt will ask if rescheduling is required.
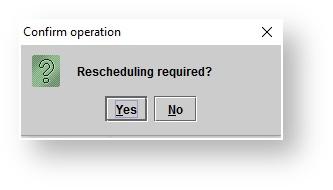
Do one of the following:- Click
- Click the No button to leave the appointment at the original date and time.

Changing the start or end time of an appointment
- Hover the cursor over the top or bottom boundary of the appointment boundary until it changes to the resize cursor.
Click and drag the boundary to the new time.
In the confirmation dialog box- Yes. The appointment will appear under the <Active> filtered screen in white, with a colored outline, as a visual indicator that another appointment can be schedule at that time. The appointment will be added to the Needs action panel.
Click No. The appointment will appear under the <Inactive> filtered screen in white, and no reminder will be sent to the Needs action panel.
- Yes. The appointment will appear under the <Active> filtered screen in white, with a colored outline, as a visual indicator that another appointment can be schedule at that time. The appointment will be added to the Needs action panel.
Marking appointments No show
- In the Scheduling tab, right-click the appointment, select Change status, and set No show as the new status.
- A prompt will ask if rescheduling is required.
Do one of the following:- Click Yes. The appointment will appear under the <Active> filtered screen in white, with a colored outline, as a visual indicator that another appointment can be schedule at that time. The appointment will be added to the Needs Actions panel.
Click No. The appointment will appear under the <Inactive> filtered screen in white, and no reminder will be sent to the Needs action panel.
Note The No show rate will appear on the patient's Summary screen.
- Click Yes. The appointment will appear under the <Active> filtered screen in white, with a colored outline, as a visual indicator that another appointment can be schedule at that time. The appointment will be added to the Needs Actions panel.
Editing appointment date and time
- In the Scheduling tab, do one of the followingDo
- Click the Yes button to save the changes to the appointment.
- Click the No button to leave the appointment at the original date and time.
Editing appointment details
- Do one of the following:
- Double-click an appointment.
- Right-click an appointment and select Edit details.
- In the Edit event details dialog box, update the details.
- Do one of the following:
- Click the Update event button to save the changes to the appointment.
- Click the Cancel button to leave the appointment unchanged.
Changing a repeating appointment
- Use the mouse to drag-and-drop an appointment to the desired date and time.
Double-click an appointment. In the Edit event details dialog box, use the Date and Start time arrows to adjust as necessary, and click
.Status title update event Tip See: Setting date, time, and duration for more information.
- The Confirm operation dialog box will appear. Click
to confirm the operation.Status title Yes
Editing appointment duration
- Click the Scheduling tab.
- On the Scheduling screen, do one of the following:
- Hover the cursor over the top or bottom boundary of an appointment, and drag the boundary to the desired time.
Double-click an appointment. In the Edit event details dialog box, hover the cursor over the top or bottom boundary of the yellow highlighted appointment in the right preview panel, and use the resize cursor to drag-and-drop the appointment to the desired start or end time.
Double-click an appointment. In the Edit event details dialog box, use the Duration slider bar to adjust as necessary, and click
.Status title update event Tip See: Setting date, time, and duration for more information.
- The Confirm operation dialog box will appear. Click
to confirm the operation.Status title Yes
Editing repeating appointments Anchor Editing repeating appointments Editing repeating appointments
| Editing repeating appointments | |
| Editing repeating appointments |
| Tip |
|---|
Repeating appointments which are linked to a patient file, are created as individual instances. Adjust patient-specific repeating appointments on an individual basis. |
- In the Scheduling tab, do one of the following:
- Double-click an instance of a repeating appointment.
- Right-click an instance of a repeating
- appointment, and select Edit details.
- In the Edit event details dialog box, update the details as necessary.
- Click the Update event button
.Status title update event - In the confirmation Confirm operation dialog box, do one of the following:
Use the drop-down menu to select This instance only
. Click OK to update only the one instance of the appointment being edited.
| Warning |
|---|
| If adjusting provider, location, or event type, and selecting This instance only, the specific appointment is no longer part of the repeating series. |
b. Use the drop-down menu to select All instances. Click OK to update all instances of the appointment.
| Note |
|---|
| Warning |
| Selecting All instances will completely remove all previous appointments in the series, and re-create the series using the start date of the instance being edited. For example, if you update a repeating appointment using the third instance of a series that has five instances, the first two instances are deleted and the third instance becomes the first instance with four instances following it. If you want to maintain a series of repeating events with their original dates, either edit the first instance of the series, or edit any other instance and change the start date to the new date (e.g. the date when the first instance occurs). This applies only when you change the following event details: location, calendar, date, time, or repeat details. Changing other appointment details (e.g. description, duration, or summary) does not cause the series to be re-created. |
Removing the repetition details of a repeating appointment
- Uncheck the Repeat check box to erase the repetition details and make the appointment non-repeating.
| . |
i. Use the drop-down menu to select This and prior instances and click OK to update the instance of the event that was selected and all previous instances of the event.
ii. Use the drop-down menu to select This and future instances and click OK to update the instance of the event that was selected and all future instances of the event.
Changing repeat patterns
In the Scheduling tab, do one of the following:
- Double-click an instance of a repeating appointment.
- Right-click an instance of a repeating appointment, and select Edit details.
- Click
(next to Repeat).Status title Edit In the Edit repetition details dialog box, adjust the repeat pattern as needed, and click
.Status title Save Tip See: Creating repeating appointments for more information. 4. Click
5. In the Confirm operation dialog box, do one of the following:Status title update event Use the drop-down menu to select This instance only. Click OK to update only the one instance of the appointment being edited.
| Warning |
|---|
| If adjusting provider, location, or event type, and selecting This instance only, the specific appointment is no longer a part of the repeating series. |
b. Use the drop-down menu to select All instances. Click OK to update all instances of the appointment.
| Warning |
|---|
| Selecting All instances will completely remove all previous appointments in the series, and re-create the series using the start date of the instance being edited. |
i. Use the drop-down menu to select This and prior instances and click OK to update the instance of the event that was selected and all previous instances of the event.
ii. Use the drop-down menu to select This and future instances and click OK to update the instance of the event that was selected and all future instances of the event.
| Panel | ||||||
|---|---|---|---|---|---|---|
| ||||||
|
| Panel | |||||||||||||
|---|---|---|---|---|---|---|---|---|---|---|---|---|---|
| |||||||||||||
|