Blueprint OMS users Appointments can link have journal entries to specific appointments. This feature will help keep you organized and up to date on patient information.
Create a linked journal entry
On the Patient browser tab, open the patient’s file.
linked to them, and event types can be configured to require linked journal entries.
Creating a journal entry linked to an appointment
Open the Journal tab of the appropriate patient.
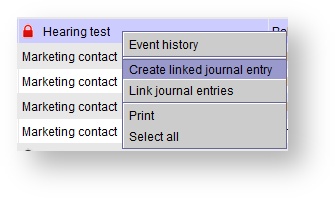
- Right-click the journal entry for the appropriate appointment.
- Select Create linked journal entry.
- In the Patient journal entry dialog box, use the drop-down menu to select a journal entry type.
In the text box, enter the desired notes.
Text Snippets are available on the right-hand side of the journal entries
Drag and drop the snippet into the journal or start typing the auto-replace text to enter the snippet into the journal entry, using text snippets as needed.
| Note |
|---|
The red lock will indicate icon indicates a completed appointment requires that is missing a required linked journal entry. |
Viewing Linked and Unlinked journal entries
On Open the Patient browser Journal tab , open the patient’s file.
- Click the Journal tab.
- Highlight an appointment and R-click
of the appropriate patient.
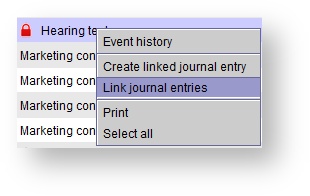
- Right-click the journal entry for the appropriate appointment.
- Select link Link journal entries.
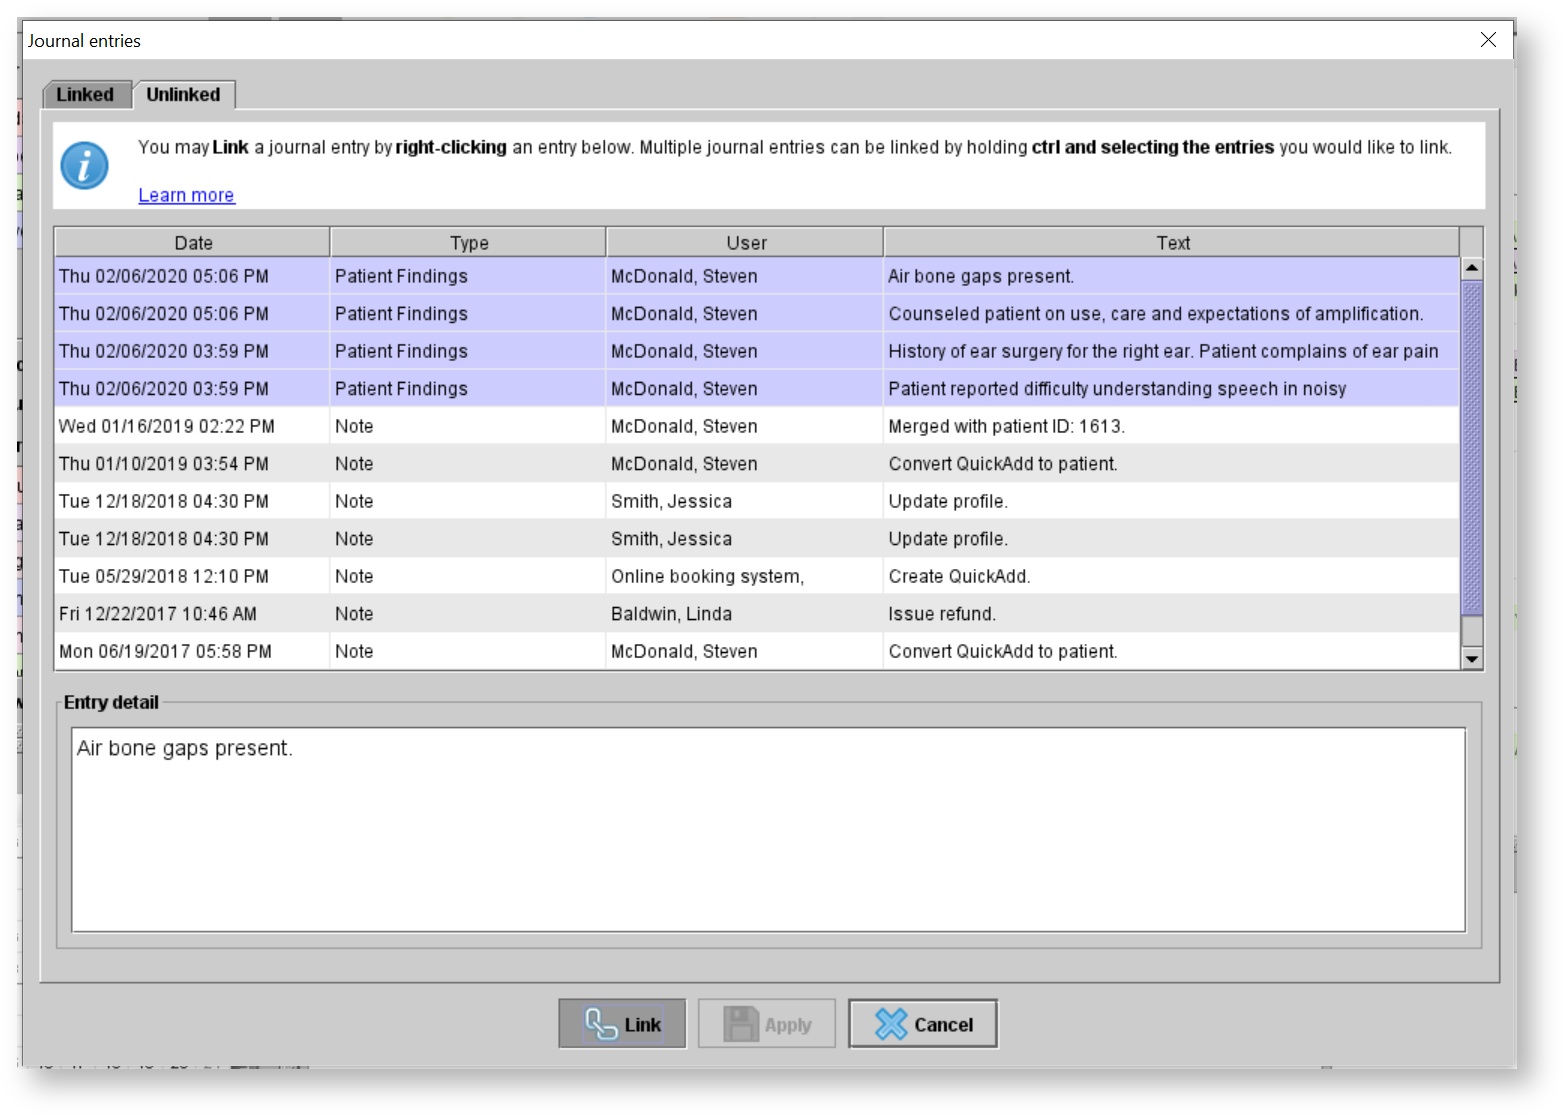
5. In the Journal entry entries dialog box, you will see 2 tabs, Linked and Unlinked.
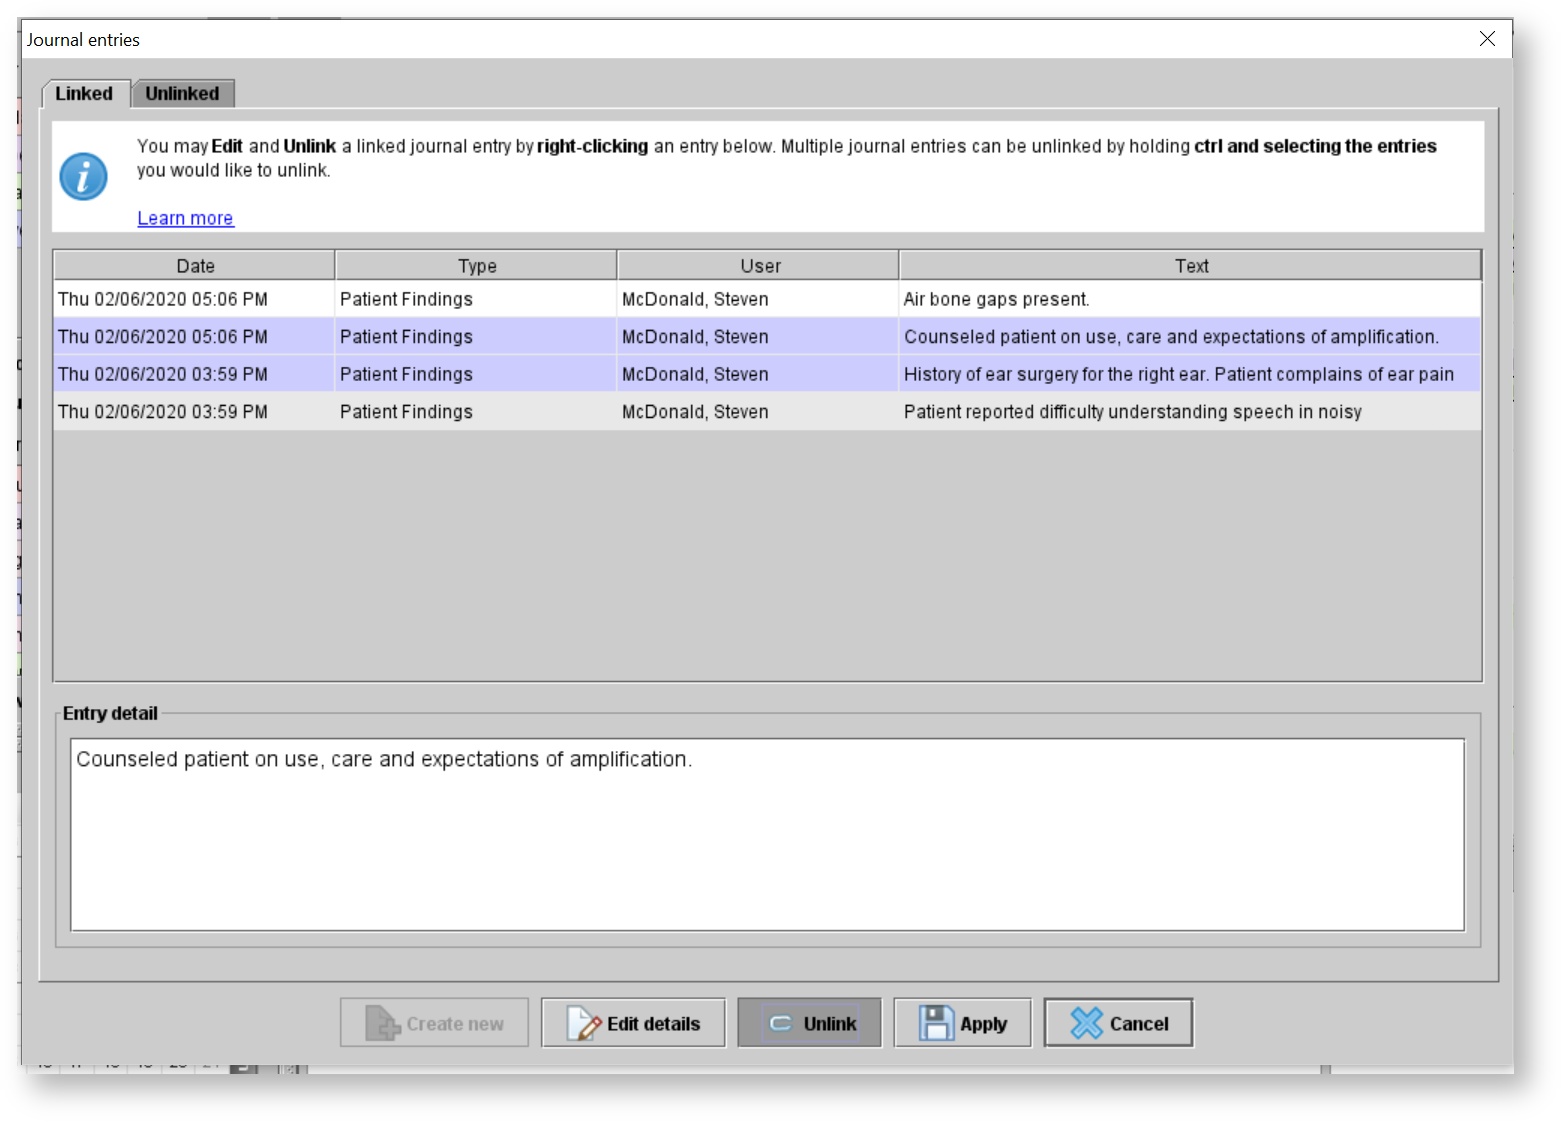
a. Linked will display all the journal entries that are currently linked to the selected appointment.
b. Unlinked will display the journal entries that are available to be linked link to the appointment.

Linking existing journal
entryentries to an appointment
- In the Journal entry dialog box, click the Unlinked tab. This tab will display journal entries that are available to be linked link to the appointment.
- Highlight a Select any journal entry entries that you wish to link to the appointmentR-click and select Link or , and click the
button at the bottom of the screen.Status title Link


4. The journal entry will be removed from the Unlinked tab and move to Linked.
Unlink journal entry from- dialog box. Then, the journal entries will move from the Unlinked tab to the Linked tab.
Unlinking journal entries from an appointment
- In the Journal entry dialog box, click the Linked tab. This tab will display journal entries that are currently linked to the appointment.
- Highlight a Select any journal entry entries that you wish to unlink from the appointmentR-click and select Unlink or click the Unlink , and click the
button at the bottom of the screen.Status title UNLINK


- dialog box. Then, the journal entries will move from the Linked tab
- to the Unlinked tab.
| Panel | ||||||
|---|---|---|---|---|---|---|
| ||||||
|
| Panel | ||||||||||||
|---|---|---|---|---|---|---|---|---|---|---|---|---|
| ||||||||||||
|
| Panel | ||||||
|---|---|---|---|---|---|---|
| ||||||