Overview of filtering and coloring
Appointments can be filtered to display a subset of appointments. Using the Filter by drop-down menu in the upper, left-hand area of the Scheduling screen, filter appointments by:
- People
- Resources
- Event type
Filtering by people
Click the Filter by drop-down menu, and select People.
Select the check box next to the desired providers to see appointments assigned to that provider.
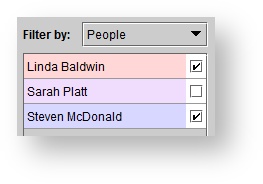
Tip Colors for providers can be adjusted within the Setup menu. See: User administration for more information.
Filtering by resource
Click the Filter by drop-down menu, and select Resources.
Select the check box next to the desired resources to see appointments assigned to that resource.
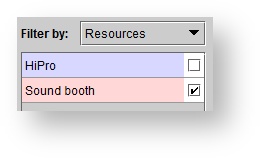
Tip To color code the appointments by appointment type, but keep the filtering by provider or resource, click the Color by appointment type check box.
Filtering by event type
Click the Filter by drop-down menu, and select Event type.
Select the check box next to the desired event types to see appointments assigned to that event type.
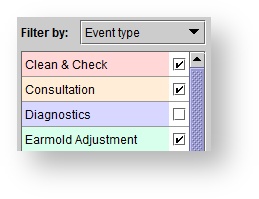
Tip Colors for event types can be adjusted within the Setup menu. See: User administration for more information.
Filtering by appointment status
| Anchor | ||||
|---|---|---|---|---|
|
Click the Status drop-down menu and select a status. The schedule displays only appointments which match the selected status.
| Note |
|---|
The appointment status filter is applied in addition to other filters (e.g. clinic, provider. resource). If selecting <Any>, all appointments matching the other filters are displayed, regardless of appointment status. |
Viewing Cancelled or No Show Appointments
- Right-click on the appointment that you are marking as Cancelled or No show
When the Confirm operation box appears and asks if rescheduling is required, select Yes or No.


- If Yes is selected, the appointment will appear in the schedule when the <Active> filter is used, but the appointment will be grayed out. A reminder will also be placed in the action required panel.
- If No is selected, the appointment will appear in the schedule when the <Inactive> filter is used, but the appointment will be grayed out.
| Tip |
|---|
The “cancelled” and “no show” appointments will show using the <Cancelled> or <No show> filters regardless of whether rescheduling is required |
| Panel | ||||||
|---|---|---|---|---|---|---|
| ||||||
|
| Panel | ||||||||||||
|---|---|---|---|---|---|---|---|---|---|---|---|---|
| ||||||||||||
|