...
| Info | ||
|---|---|---|
| ||
Merging duplicate patient files requires the Merge client user privilege Merge client. |
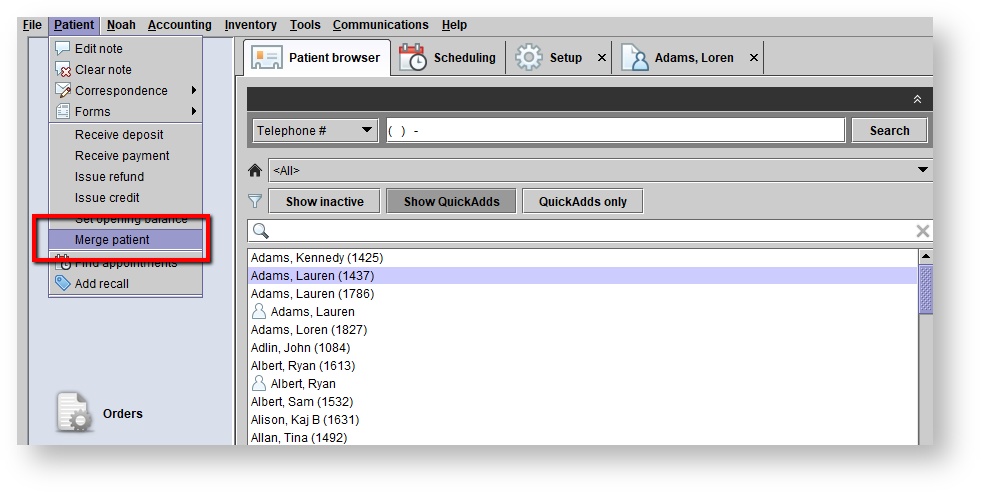
- Begin by selecting the duplicate patient you want merged into a different patient file.
- This is accomplished by either opening the patient's file or highlighting the patient in the Patient Browser.
- Click the Patient drop-down menu and select " Merge patient."
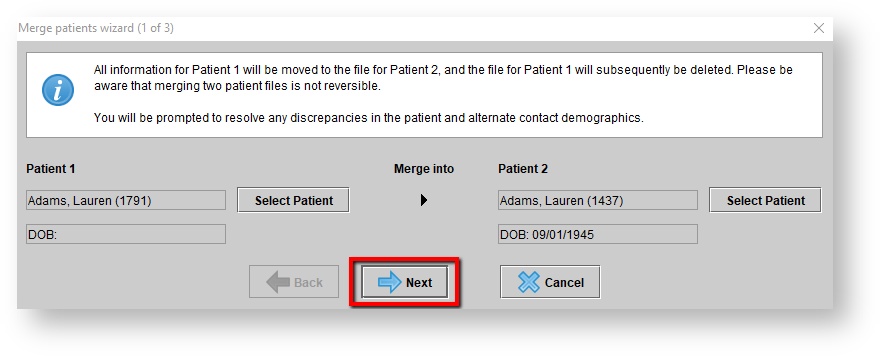
3. The Merge Patients Wizard begins:
Merge Patients Wizard
| Info |
|---|
Steps of the Merge Patients Wizard may be skipped, depending on what discrepancies exist between the merging patients. |
Step 1.
- The selected patient will display in the Patient 1 column on the left.
- If the incorrect patient was selected, use the
 button to choose a different one.
- If the incorrect patient was selected, use the
...
2. In the Patient 2 column, select which patient Patient 1 should be merged into.
- a A list of potential duplicate patients (based on similar first and last names) will appear.
- Results with a matching surname and birthdate will appear in bold.
...
4. The Patient 1 and Patient 2 columns will now be filled. Click Next to proceed.
Step 2. resolving contact details discrepancies
- Any discrepancies for the contact details between Patient 1 and Patient 2 will appear.
- By default, each contact detail box for Patient 2 will be selected, with the checkboxes for Patient 1 empty.
- Select any contact details for Patient 1 which should be prioritized over Patient 2, by clicking the empty checkbox next to the contact detail.
- If necessary, use all contact details under the Patient 1 column by clicking

...
2. Click  to proceed.
Step 3. resolving alternate contact discrepancies (if any exist)
- Any discrepancies between the alternate contact details for Patient 1 and Patient 2 will display.
- By default, the alternate contact detail boxes for Patient 2 will be selected, with the checkboxes for Patient 1 empty.
- Select any alternate contact details on Patient 1's account (if they exist) to be prioritized in the final merged patient.
- Click to use only the alternate contact listed on Patient 1's account.
- The Merge result column will display the final alternate contact details for the combined patient file.
...
- Click to proceed to the final step.
Step 4. Resolving patient insurers discrepancies (if any exist)
- Patient insurers existing on the accounts for Patient 1 and Patient 2 will display.
- Insurers listed only on Patient 2's account will be selected by default. Add or remove insurers by unchecking or checking the insurer boxes, as needed.
- Select to instead use only the insurers on Patient 1's account in the final patient file.
...