Occasionally, users may accidentally create duplicates of the same patient file in Blueprint OMS. This page will demonstrate how to merge these files into a single patient account.
Merging duplicate patient files requires the Merge client user privilege. |
- Begin by selecting the duplicate patient you want merged into a different patient file.
- This is accomplished by either opening the patient's file or highlighting the patient in the Patient Browser.
- Click the Patient drop-down menu and select Merge patient.
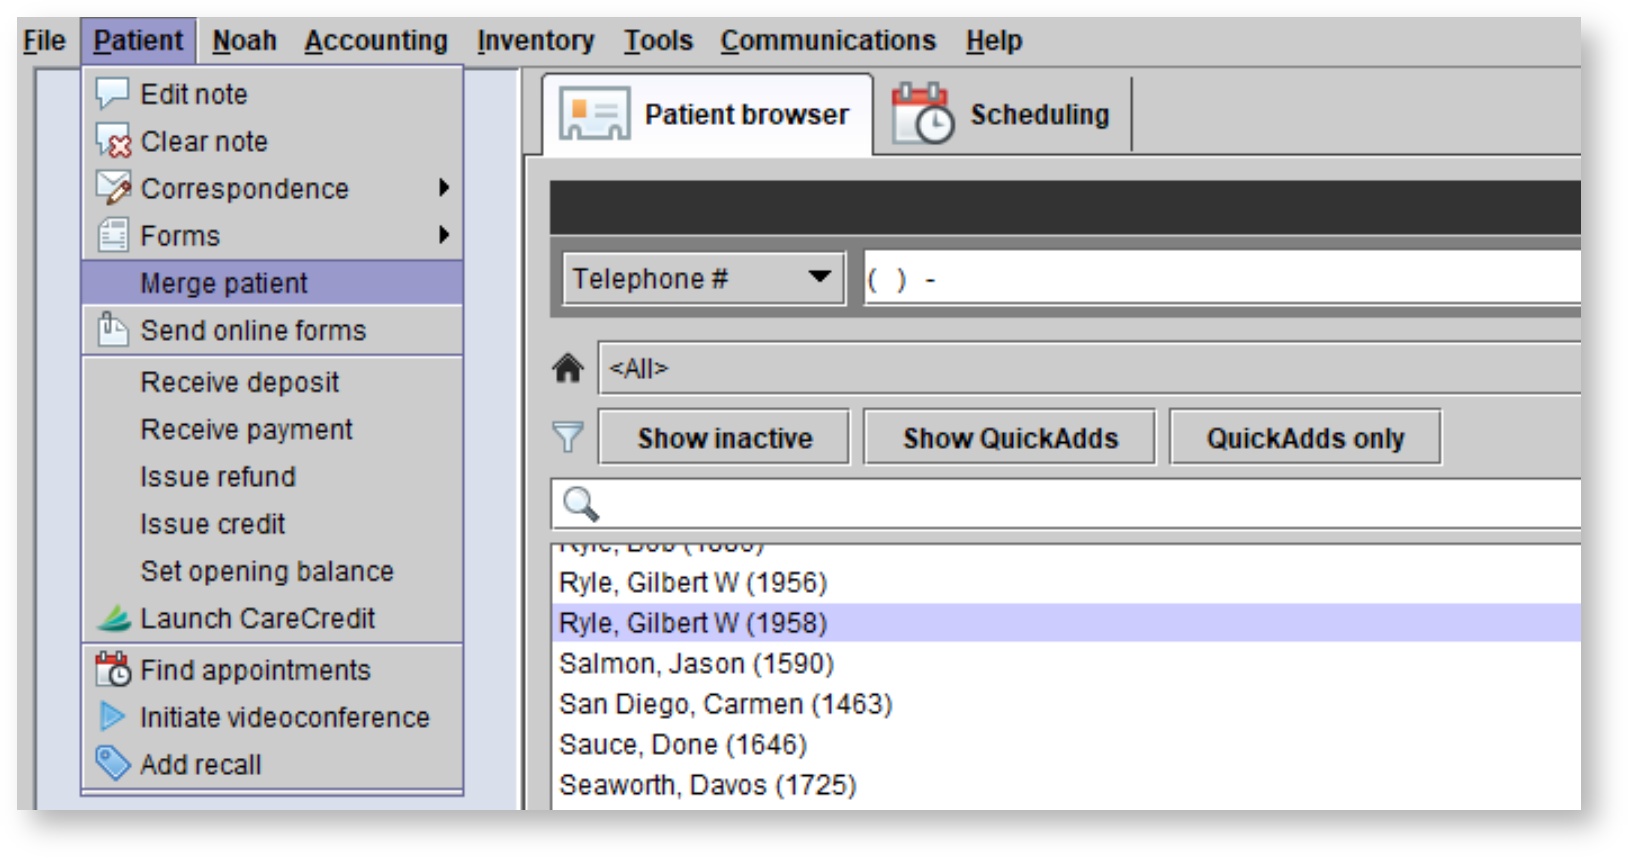
3. The Merge Patients Wizard begins:
Merge Patients Wizard
Steps of the Merge Patients Wizard may be skipped, depending on what discrepancies exist between the merging patients. |
Step 1.
- The selected patient will display in the Patient 1 column on the left.
- If the incorrect patient was selected, use the
 button to choose a different one.
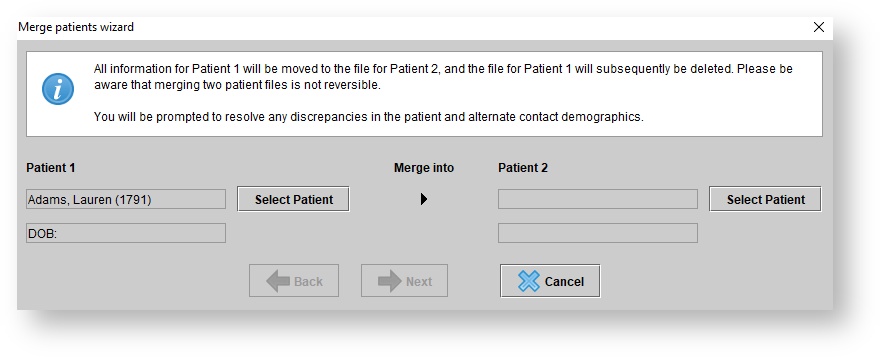
2. In the Patient 2 column, select which patient Patient 1 should be merged into.
- A list of potential duplicate patients (based on similar first and last names) will appear.
- Results with a matching surname and birthdate will appear in bold.
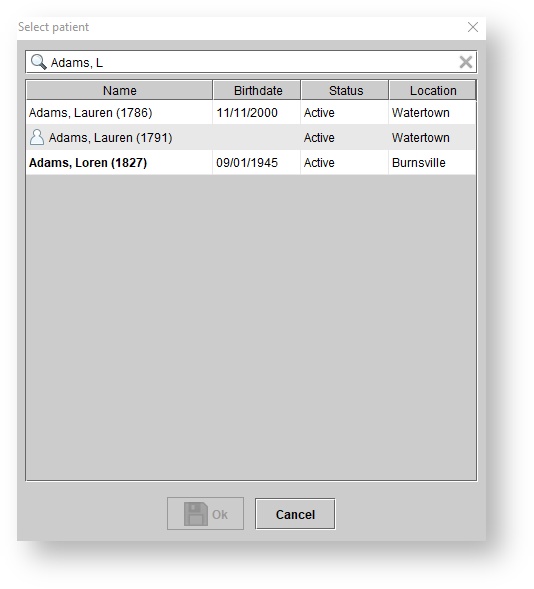
If no possible duplicates appear, search for the correct patient using the Quickfind field, denoted by the  icon. icon. |
3. Highlight the correct patient from this list and choose 
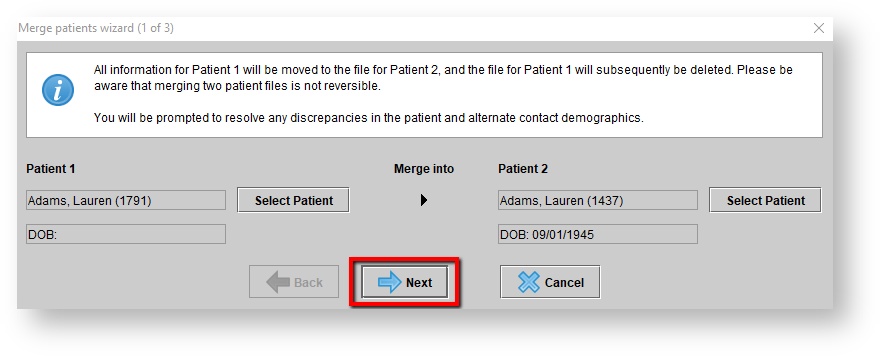
4. The Patient 1 and Patient 2 columns will now be filled. Click Next to proceed.
Step 2. resolving contact details discrepancies
- Any discrepancies for the contact details between Patient 1 and Patient 2 will appear.
- By default, each contact detail box for Patient 2 will be selected, with the checkboxes for Patient 1 empty.
- Select any contact details for Patient 1 which should be prioritized over Patient 2, by clicking the empty checkbox next to the contact detail.
- If necessary, use all contact details under the Patient 1 column by clicking

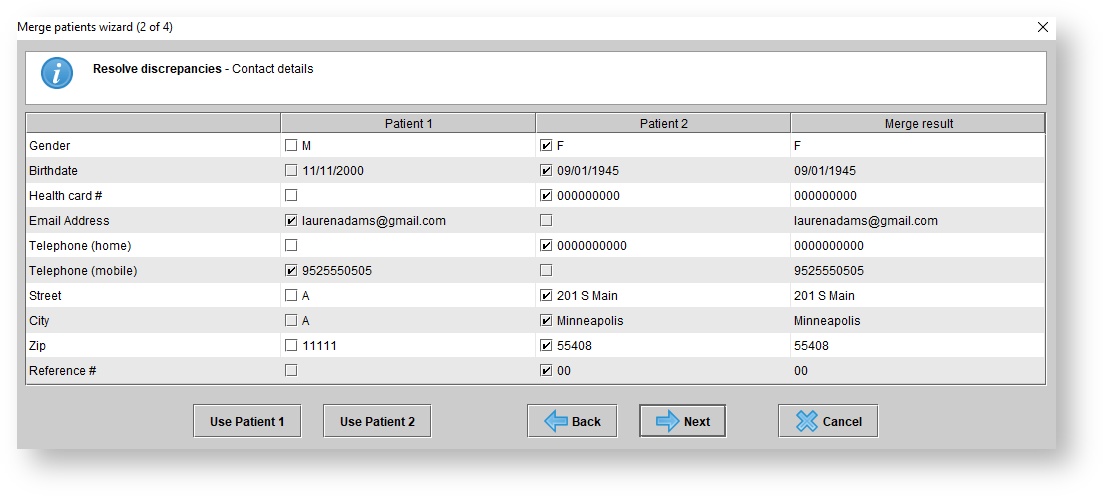
- Final contact details to be used in the combined patient file will display in the Merge result column.
2. Click  to proceed.
Step 3. resolving alternate contact discrepancies (if any exist)
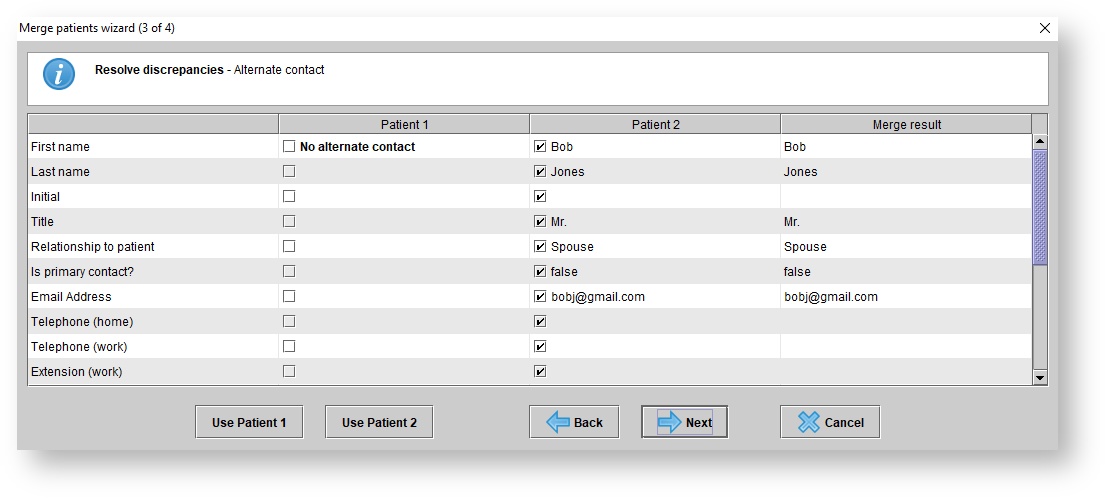
- Any discrepancies between the alternate contact details for Patient 1 and Patient 2 will display.
- By default, the alternate contact detail boxes for Patient 2 will be selected, with the checkboxes for Patient 1 empty.
- Select any alternate contact details on Patient 1's account (if they exist) to be prioritized in the final merged patient.
- Click
 to use only the alternate contact listed on Patient 1's account.
 - The Merge result column will display the final alternate contact details for the combined patient file.
- Click
 to proceed to the final step.
Step 4. Resolving patient insurers discrepancies (if any exist)
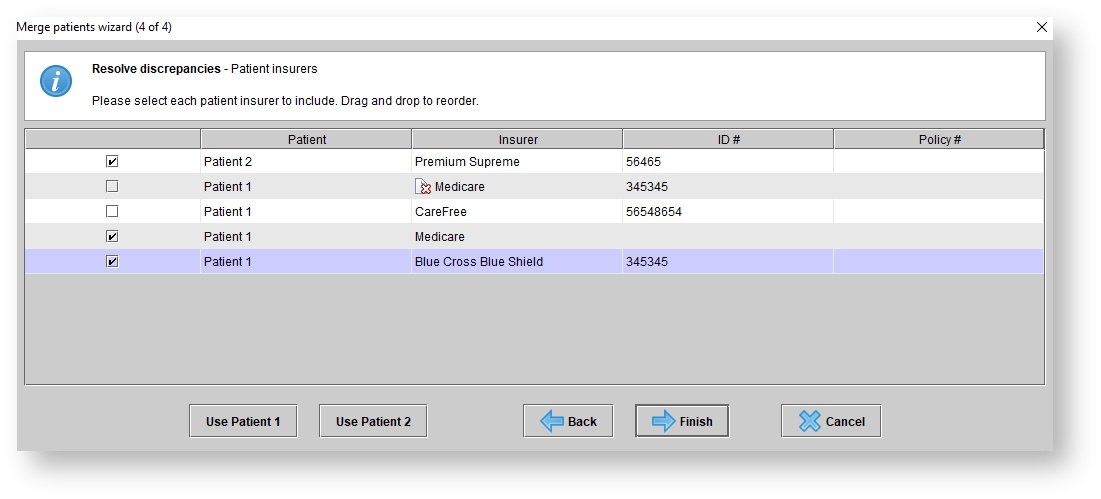
- Patient insurers existing on the accounts for Patient 1 and Patient 2 will display.
- Insurers listed only on Patient 2's account will be selected by default. Add or remove insurers by unchecking or checking the insurer boxes, as needed.
- Select
 to instead use only the insurers on Patient 1's account in the final patient file.
2. When ready, select 
- A Confirm operation dialog will appear. Choose Yes to confirm the merge or No to make any changes by clicking


Patient 2 will subsequently become the main patient file. This cannot be reversed. Any duplicate files existing in Quickbooks will need to be manually merged. |
Once the merge is complete, you will receive a confirmation pop-up.


 button to choose a different one.


 to proceed.
 to use only the alternate contact listed on Patient 1's account.
 to proceed to the final step.
 to instead use only the insurers on Patient 1's account in the final patient file.


