This page covers editing existing users in Blueprint OMS.
| Note |
|---|
Users must have the Maintain users and roles user privilege in order to edit existing users. |
Edit employee usernames and details
- At Setup > User administration > Users, double-click on the user you wish to edit.
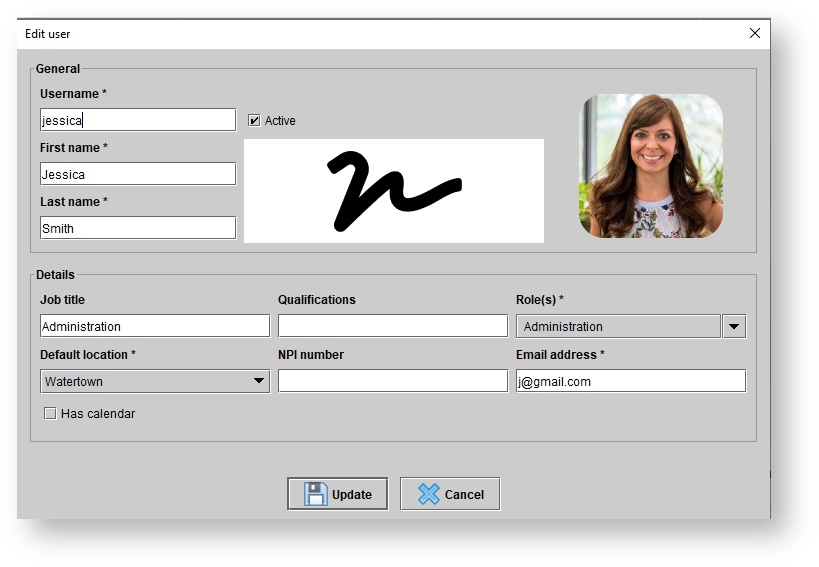
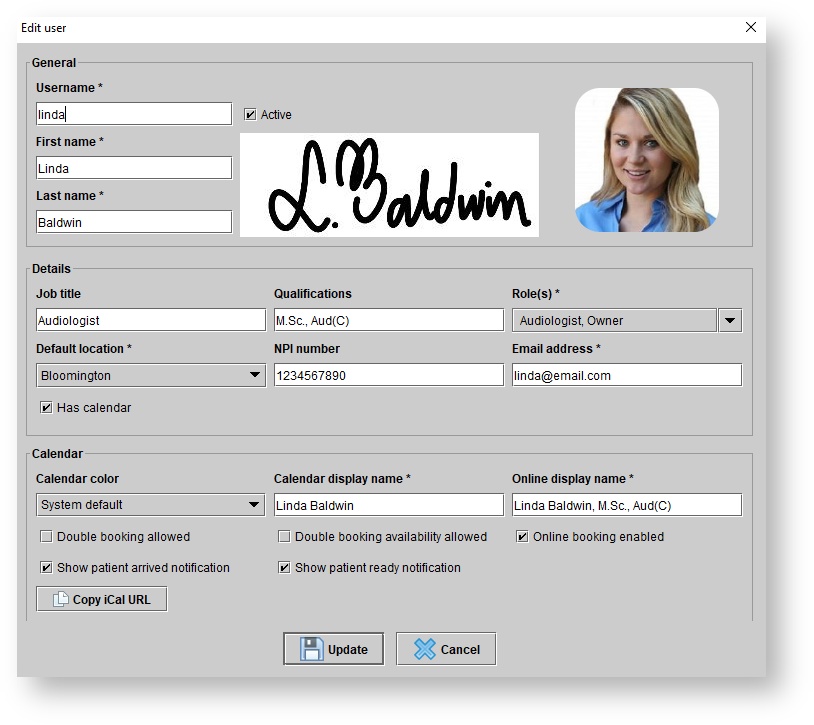
- The Edit user dialog box will appear. In it, adjust the details of the user as needed.
- Click
.Status title Update
This is a user example without a calendar on the schedule tab:
This is a user example with a calendar on the schedule tab:
Uploading a user signature
Upload user default user signatures to populate on suitably configured forms and correspondence templates. This saves time and paper at the clinic.
Have staff members sign a white piece of paper using a dark, thick pen or marker. Then, take a scan of the signatures.
Dimensions
For best results, use this guide which is set up with the dimensions Blueprint OMS uses.
- At Setup > User administration > Users, right-click the user whose signature you want to set, and select Edit details.
- The Edit user dialog will appear; in it, click on the signature placeholder.
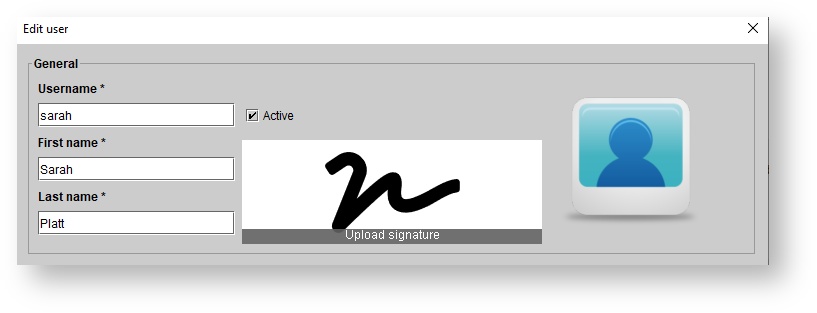
- A new dialog will appear, prompting you to select a file from your library. Choose the scan.
- The Edit signature dialog will appear. In it, you can resize and rotate the page, and drag the bounding box over the appropriate signature.
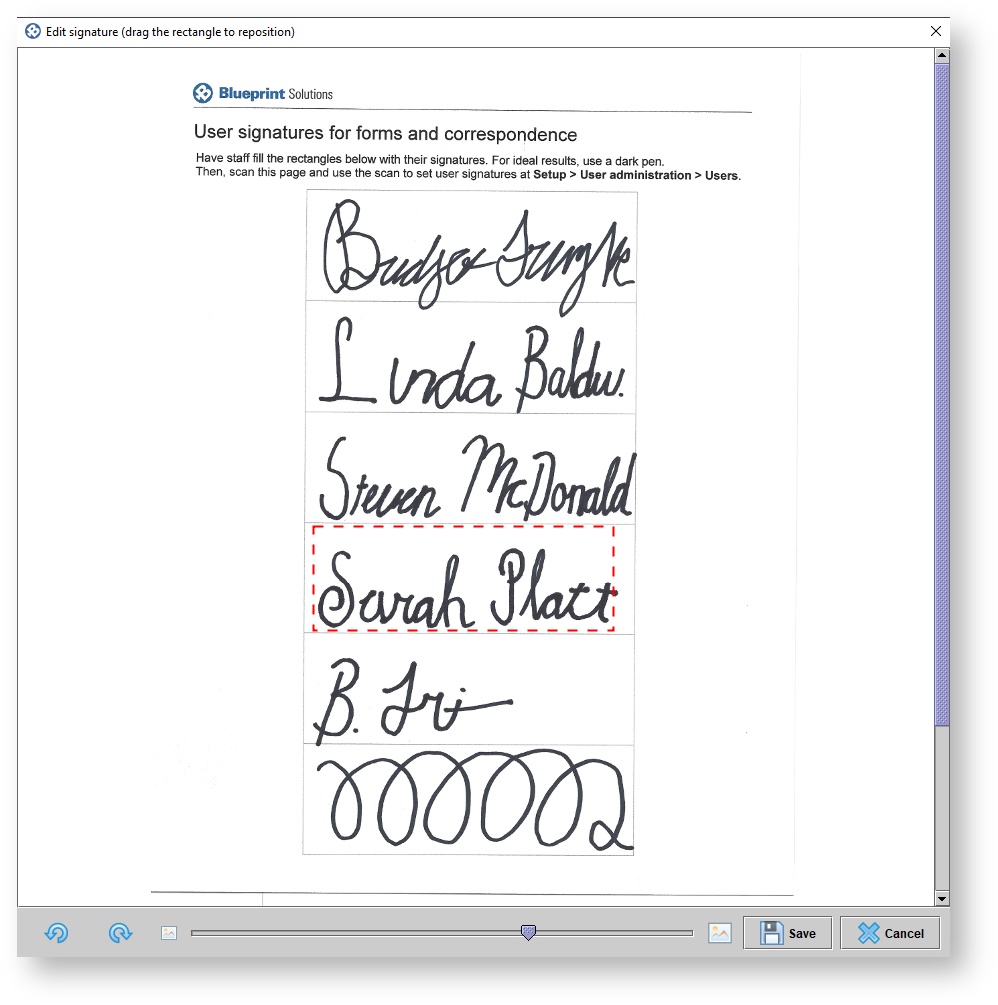
- When everything looks good, click Save.
Change user passwords
- At Setup > User administration > Users, right-click on the user whose password you wish to change, and select Change password.
The Change password dialog box will appear. In it, enter a New password, enter the same password in the Verify new password field, and click Ok.
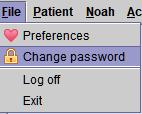
Tip Passwords can also be changed by the individual users by clicking the File drop-down menu and selecting Change password.
Editing user privileges
- At Setup > User administration > Users, right-click on the user whose privileges you wish to edit, and select Edit privileges.
The Edit user privileges dialog box will appear. In it, click on the privileges you wish to grant to or restrict from the user.
Tip A blue check mark will indicate the privilege is assigned to the user. The name of a role will appear next to a privilege associated with the user's assigned role(s). Hovering the mouse over the name of the privilege provides additional information for the privilege's function. 
Note If the privilege is assigned to a role, remove the privilege from the role in order to remove it from the user's individual privileges. - Click
.Status title Update
| Tip |
|---|
Use the Role(s) drop-down menu to adjust the user's assigned role(s). Use the Copy privileges from drop-down menu to assign the user privileges already associated with another role or user. |
Editing user reports
- At Setup > User administration > Users, right-click on the user whose reporting access you wish to edit, and select Edit reports
The Edit user reports dialog box will appear. In it, click on the reports you wish to grant to or restrict from the user.
Tip A blue check mark will indicate the report is assigned to the user. The name of a role will appear next to a report associated with the user's assigned role(s). Report descriptions can be found at this link. 
Click
.Status title Update
| Tip |
|---|
Use the Role(s) drop-down menu to adjust the user's assigned role(s). Use the Copy privileges from drop-down menu to assign the user reports already associated with another role or user. |
Editing user scheduling and location access
At Setup > User administration > Users, right-click on the user whose scheduling or location access you wish to edit, and select Edit scheduling/location.
- The Edit user locations dialog box will appear. In it, select the locations you wish the user to have access to as well as the locations the user can be scheduled at.
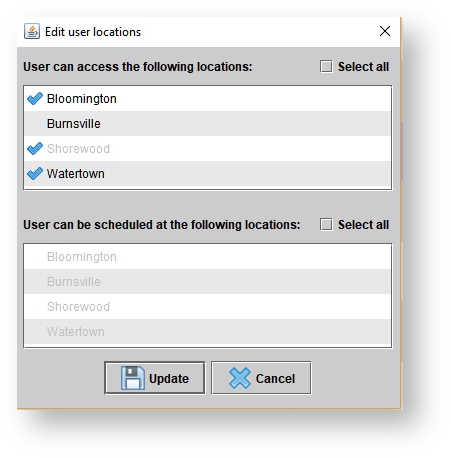
- Click
.Status title Update
Edit provider tax numbers
At Setup > User administration > Users, right-click on the user whose provider tax number you wish to edit, and select Edit provider tax numbers.
The Edit provider tax number dialog box will appear. In it, click into the Federal tax number field across from the desired location to enter the correct number. Optionally, click into the ID type field to select EIN or SSN.
Note The <Unassigned> location should contain the Federal tax number for the main location. This data is simply stored for database purposes. Click
.Status title Update Note The Federal tax number and ID type will generate in box 25 on the HCFA 1500 claim form.
Editing provider license numbers
At Setup > User administration > Users, right-click on the user whose provider tax number you wish to edit, and select Edit provider license number.
The Edit provider license numbers dialog box will appear. In it, click into the License number field beside the desired location to enter the correct number.
Click
.Status title Update
Deactivating users
| Note |
|---|
Once deactivated, the user can no longer log into Blueprint with their username and password. |
At Setup > User administration > Users, right-click on the user whose provider tax number you wish to deactivate, and select Deactivate.
| Tip | ||||
|---|---|---|---|---|
To reactivate a user, un-check the Show active items only check box at the top of the Users panel. Click on a deactivated user (indicated with a red X), and click
|
| Panel | ||||||
|---|---|---|---|---|---|---|
| ||||||
|