Versions Compared
| Version | Old Version 14 | New Version 15 |
|---|---|---|
| Changes made by | ||
| Saved on |
Key
- This line was added.
- This line was removed.
- Formatting was changed.
Overview
The process for creating an online form template is almost exactly the same as that for creating any other form template in Blueprint OMS. There are only four key differences:
- With online form templates, you might want to set some fields to be read-only fields.
- With online form templates, you will want to pay attention to the tab order of the fields, so that, when a patient navigates the form using the Tab key on their keyboard, they will go through the fields in the desired order.
- With online form templates, you can make some fields required, so that the patient cannot submit the form without entering something in the field.
- With online form templates, you can some fields enforce a certain input format, such as a date, a telephone number, or an email address.
For all four of these items, your PDF editor will have field properties allowing for the desired functionality.
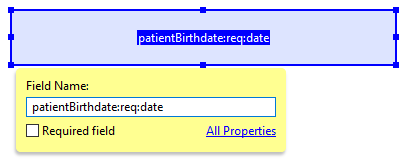
For the latter two items, follow this general format for form field names: (merge field):(required):(validation type). The latter two slots are optional, so your existing PDF templates are already forward-compatible with the online forms, to the extent that they will populate field data and map new inputs to the corresponding fields for the patient file.
| Expand | |||||||||||||||||||||||||||||||||||||||||||||
|---|---|---|---|---|---|---|---|---|---|---|---|---|---|---|---|---|---|---|---|---|---|---|---|---|---|---|---|---|---|---|---|---|---|---|---|---|---|---|---|---|---|---|---|---|---|
| |||||||||||||||||||||||||||||||||||||||||||||
|
Read-only fields vs. editable fields
| Expand | |||||||
|---|---|---|---|---|---|---|---|
| |||||||
You may wish to include on your form some text fields that you do not want the patient to be able to edit. Set these fields as read-only fields using the Read Only checkbox in the General tab of the Text Field Properties dialog. Any field that is not read-only will be editable by the patient.
|
Tab order of editable fields
| Expand | |||||
|---|---|---|---|---|---|
| |||||
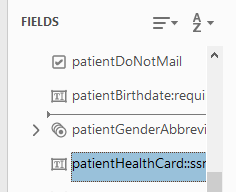
A patient viewing an online form may press the Tab button on their keyboard to move through the form. You can specify the order in which tabbing moves a user through your document, to ensure that your form is as user-friendly as possible Viewing the tab order of your formIn Prepare Form mode, you can see the fields listed by name in the panel on the right-hand side of the window. They should be displayed in tab order by default, but you may use the A/Z drop-down menu to toggle between tab order or alphabetic order.
Optionally, in Prepare Form mode, in the Order Tabs drop-down menu, you can select Show Tab Numbers to make the form fields show their position in the tab order in the upper-left corner.
Changing the tab order
One way to change the tab order is to right-click a field and select Move Up in Tab Order or Move Down in Tab Order.
Alternatively, in Prepare Form mode, go to the panel on the right-hand side and drag the entries into the desired positions.
Alternatively, in Prepare Form mode, go to the panel on the right-hand side, expand the Order Tabs drop-down menu, and select Order tabs by Structure or Order tabs by Row to reset the tab order according to the fields' positions on the page.
|
Field name slot 1: merge field name

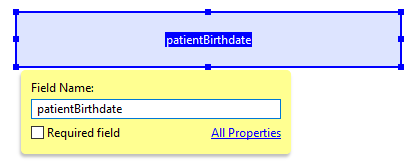
If you wish to use a form field as a merge field, set the first part of the form field's name to the merge field name. If merge data exists for the chosen field, it will populate in the form field; if the patient edits that form field, then a Blueprint OMS user's processing the form will make the patient file reflect the new data entered in the form field. You can find the full list of available merge fields at the template tool on the Blueprint Solutions website.
For a form field is not meant to display or update Blueprint OMS field data, enter any text for this part of the field name, and make sure that the fields on the form have unique names.
| Expand | ||||||||||||||||||||||||||||||||||||||||||||||||||||||||||||||||||||||||||||||||||||
|---|---|---|---|---|---|---|---|---|---|---|---|---|---|---|---|---|---|---|---|---|---|---|---|---|---|---|---|---|---|---|---|---|---|---|---|---|---|---|---|---|---|---|---|---|---|---|---|---|---|---|---|---|---|---|---|---|---|---|---|---|---|---|---|---|---|---|---|---|---|---|---|---|---|---|---|---|---|---|---|---|---|---|---|---|
| ||||||||||||||||||||||||||||||||||||||||||||||||||||||||||||||||||||||||||||||||||||
|
Field name slot 2: req or nonreq

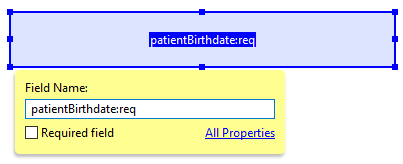
After the first part of the field name, enter a colon and then "req" to make the field a required field, or "nonreq" (or alternatively, nothing, since "nonreq" is the default) to not make the field a required field.
Non-text fields such as checkboxes, radio groups, and drop-down menus can also be made required using the "req" designation.
| Expand | ||||||||||||
|---|---|---|---|---|---|---|---|---|---|---|---|---|
| ||||||||||||
|
Field name slot 3: validation type

The third part of the form field's name is the type of validation that will be enforced by the field. This third part only applies to text fields and should be omitted for other types of form fields, and for text fields that don't require any specific format for the input.
| Expand | |||||||||||||||||||||||||||||||||||||||||||
|---|---|---|---|---|---|---|---|---|---|---|---|---|---|---|---|---|---|---|---|---|---|---|---|---|---|---|---|---|---|---|---|---|---|---|---|---|---|---|---|---|---|---|---|
| |||||||||||||||||||||||||||||||||||||||||||
Here are the options you can enter in the third slot:
|
| Panel | ||||||
|---|---|---|---|---|---|---|
| ||||||
|
...


